How to consult, confirm, extend and resign from the power of attorney received
Query of received powers of attorney
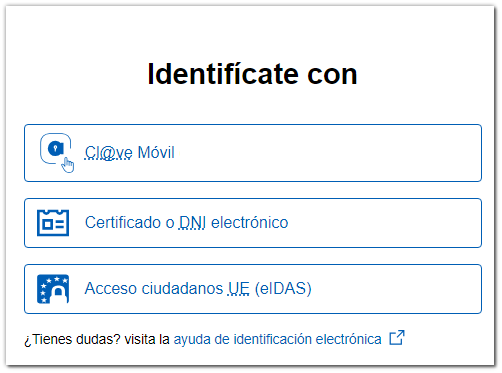
The attorney can view the powers of attorney received by logging in with a certificate. ID card electronic, Cl@ve or with the identification system for citizens of the European Union (eIDAS) using the identification of another country.
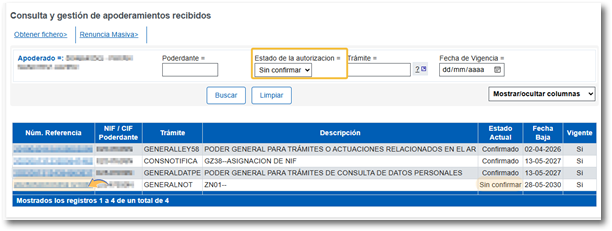
Once you have selected the type of access, you will obtain the window for consulting and managing received powers of attorney, where the NIF and the name or company name of the power of attorney will be indicated.
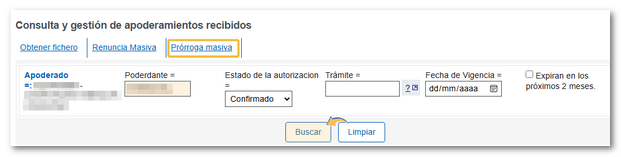
You can filter your search by "Principal", "Authorization Status", "Process" and "Effective Date". Press "Search"; The first 10 will be displayed, and if there are more results, click on "More" and "Next" to view the rest of the power of attorney. According to the current status, the following situations will appear: "Not Authorized", "Unconfirmed" or "Confirmed".

Confirmation of powers of attorney received
Currently, it is only necessary for the attorney to confirm the power of attorney that has been granted to him if it is a procedure related to notifications.
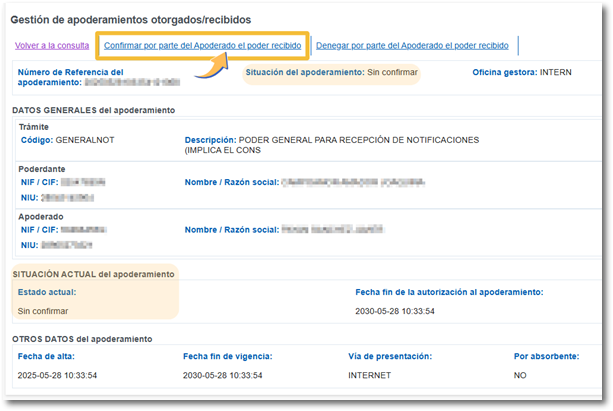
To confirm a power of attorney, click on the reference number of the power of attorney that is in the "Not Authorized" or "Unconfirmed" status.
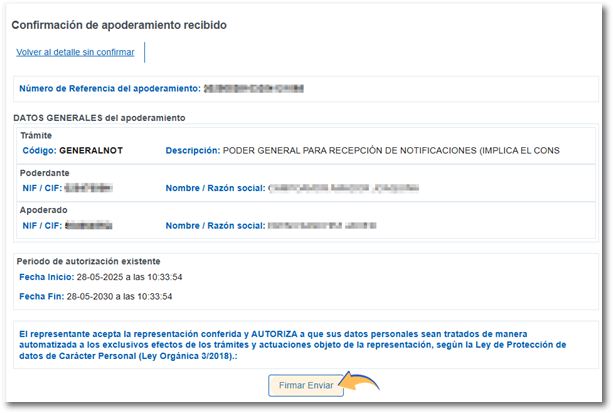
In the next window, check all the details of the file, including the status of the power of attorney and the current status. Click the "Confirm the power of attorney received by the Attorney" link above to continue the process.
Click "Sign and Send" to continue.
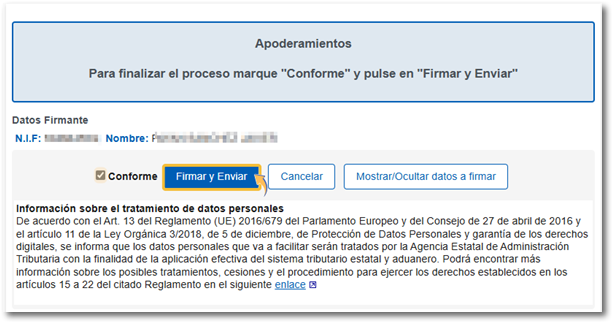
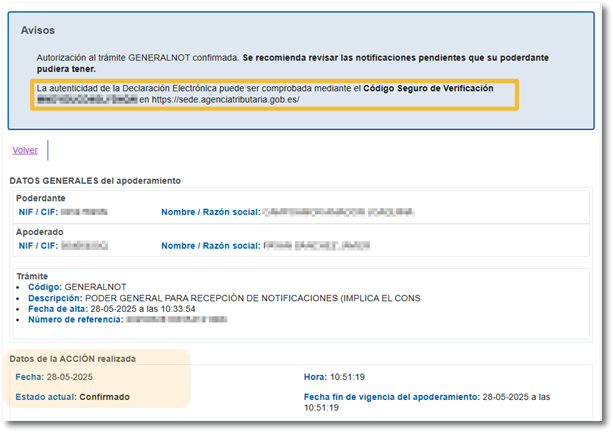
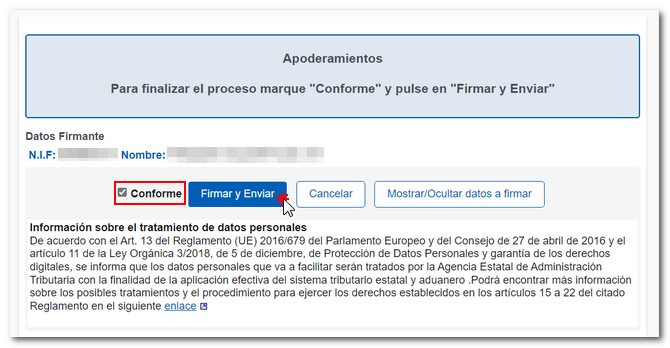
Then check the "I agree" box and click "Sign and Send" to complete the process.
Renunciation of powers of attorney received as an agent
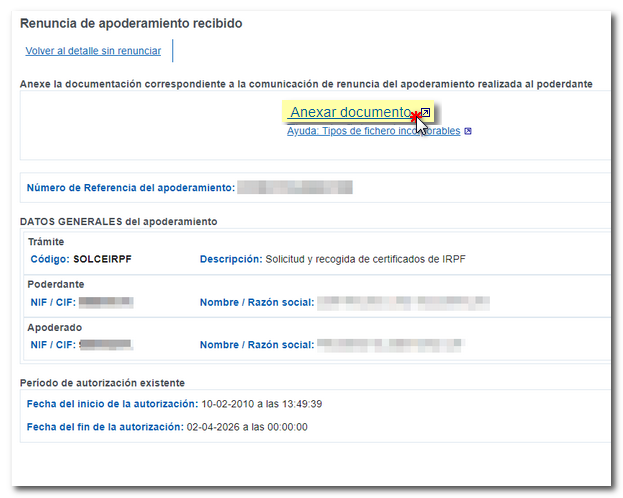
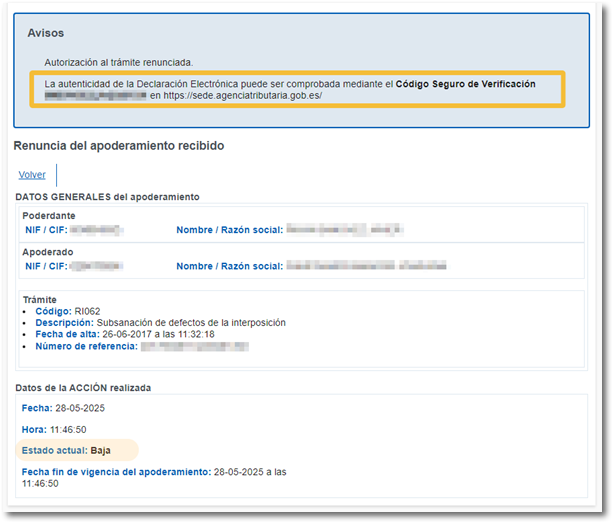
The agent may renounce a power of attorney at any time provided that he/she proves to the Tax Agency that said renunciation has been reliably communicated to the represented party. Until that time, your registration will not be cancelled. Therefore, to renounce the power of attorney it will be necessary to attach a file in PDF format with the scanned copy of the burofax that the attorney sends to the principal informing him of the renunciation of the power of attorney registered in the Registry.
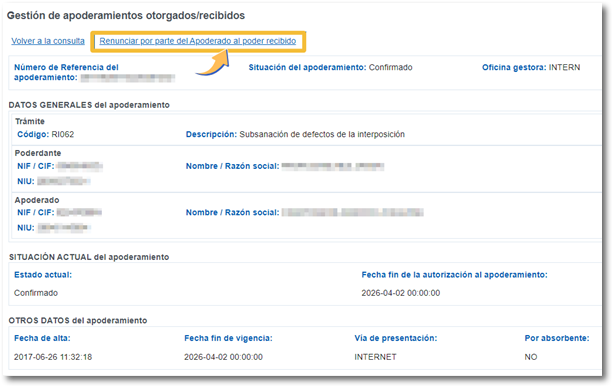
To resign, click on the power of attorney reference number.

In the next window, click "Renounce the power of attorney received by the Attorney-in-fact" if it is confirmed, or "Deny the power of attorney received" if it is unconfirmed.
Next, click on "Attach document" to select the burofax file.

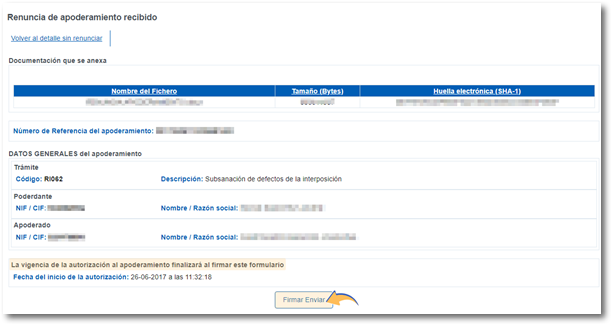
Once the document is attached, click "Sign and Send."
Check the "I agree" box and click "Sign and Send" to complete the process.
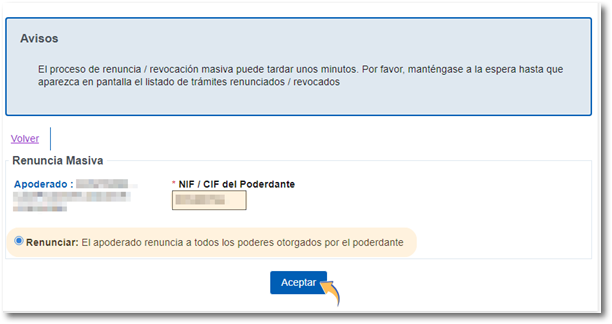
From "Mass Resignation" you can resign all the powers of attorney of a given principal at once, instead of having to resign individually.
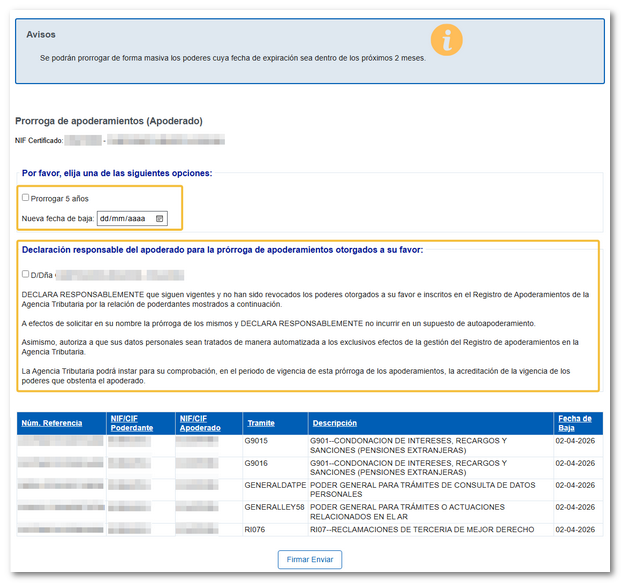
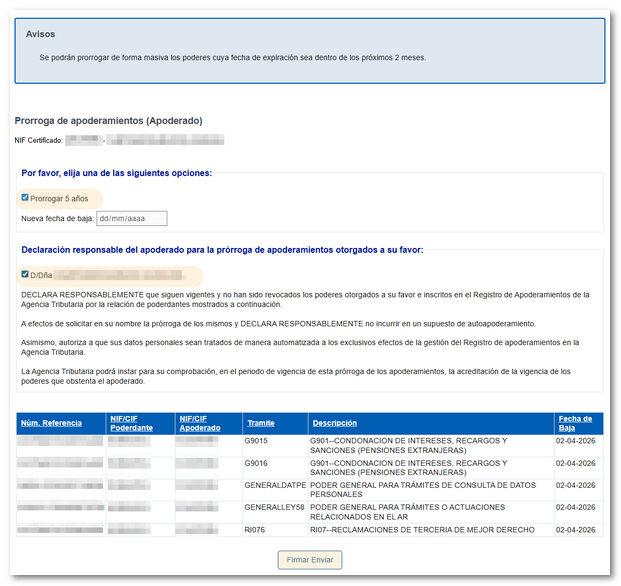
A new "Mass Extension" option has been enabled that allows, as an attorney, to extend powers of attorney received that are due to expire within the next two months.
You can choose to renew them for 5 years or indicate the expiry date. You will need to sign a declaration of responsibility, by checking the box provided for this purpose.