How to obtain the reference number of the Income Tax file in offices by appointment
If you do not have the amount from box 505 of your 2024 Income Tax return to obtain your 2025 Income Tax reference, nor any of the other necessary identification systems, such as an electronic certificate, DNIe, Cl@ve or authentication eIDAS You can request an appointment to go to the Administration so that we can provide you with the reference number.
It will be available from March 11th. You can access this service until June 30, 2026 (end of the 2025 Income Tax campaign).
In this case, access the appointment request service from the "All Procedures," "Other Services," "Assistance and Appointments" section, or from the banner available on the "Assistance and Appointments" homepage.
Then, click "Assistance and Appointment for Individuals." Please note that this is not a quote for Renta.
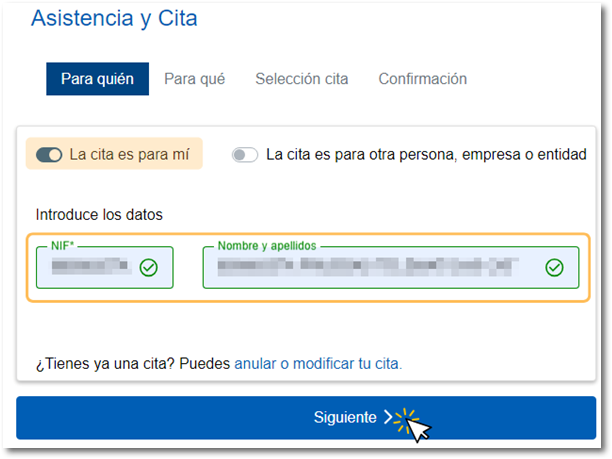
Step 1. For whom
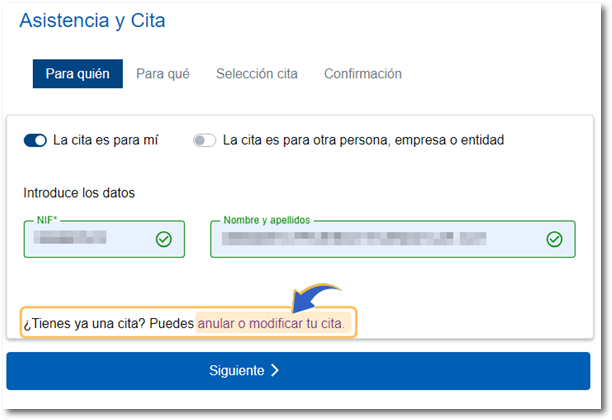
Select "The appointment is for me" and enter the NIF or NIE , name and surname and press "Next" . The appointment request does not require any specific identification system.
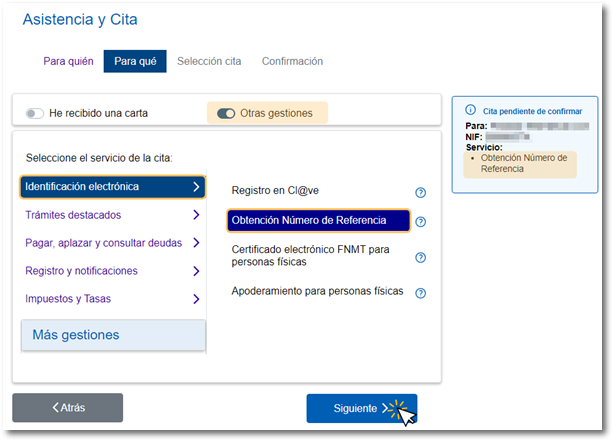
Step 2. So that
Click "Other Procedures" to display the rest of the options, select the "Electronic Identification" service, and select the "Obtain Reference Number" option. Click "Next".
Step 3. Appointment Selection
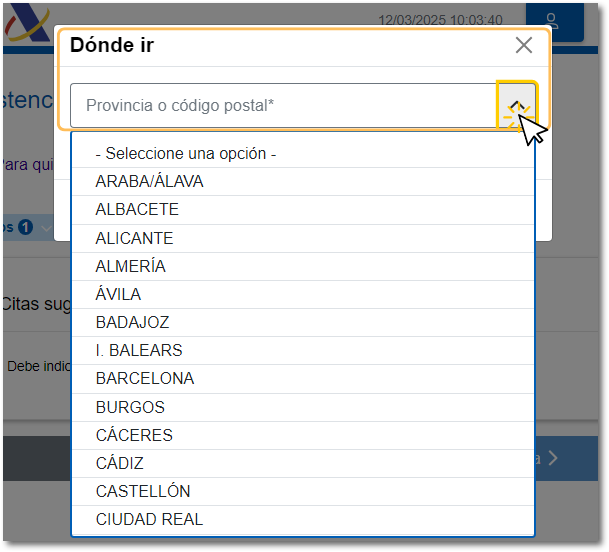
In the next step you can choose the office you wish to go to for your appointment; You can search by postal code or by province.
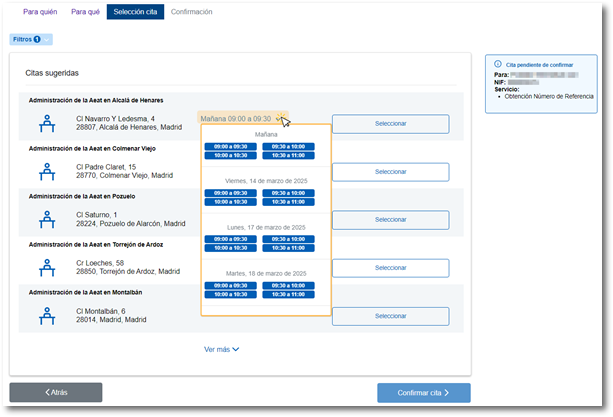
Select the option you prefer and click on the date and time. A pop-up window will open with the available days and time slots.
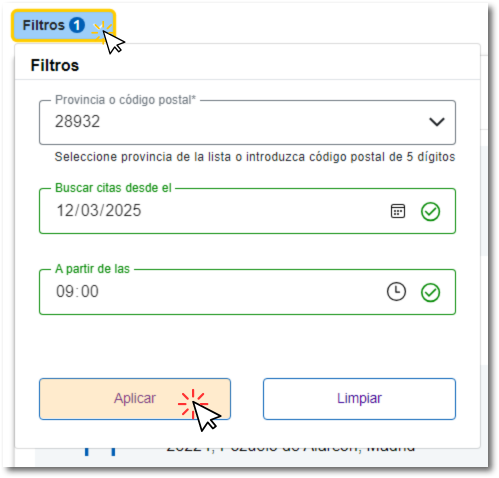
Click "See more" to view the full list. If you are not interested in the appointments suggested by the app, you can filter by province or postal code, date and time to find other available appointment options. Click the "Filters" drop-down menu, select your search criteria, and click "Apply."
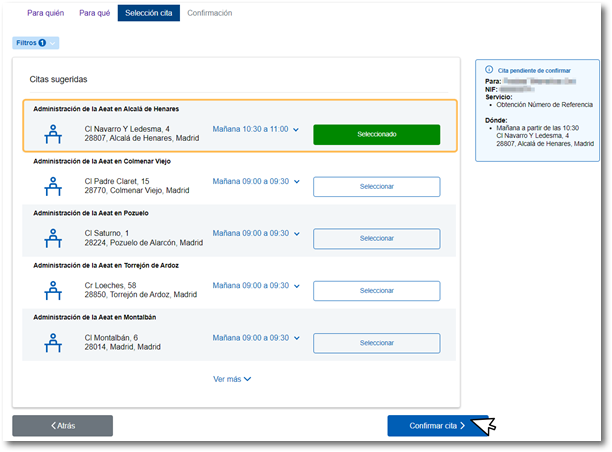
To choose the date and time slot, click the "Select" button corresponding to the option you've chosen. The button will change color to "Selected" and the selected data will be added to the box on the right margin next to your data. Click "Confirm Appointment" to continue.
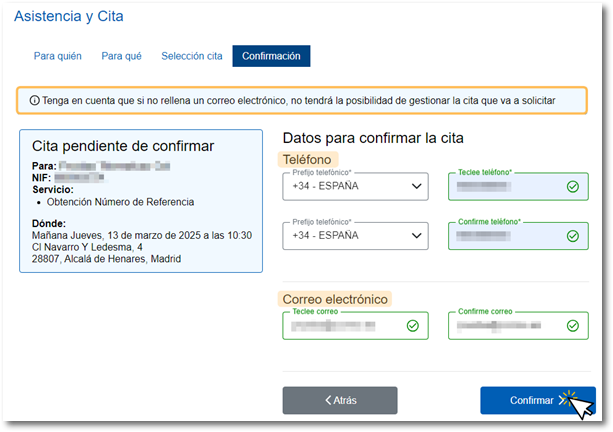
Step 4. Confirmation
Finally, you'll need to provide and confirm a phone number (foreign numbers are accepted). It is important to provide a valid email address as you will receive an email with your appointment details, which you can use to manage (modify and cancel) your appointment if necessary. You can also provide the reason for your inquiry in up to 250 characters. Click on "Confirm".
A message will be displayed indicating that the appointment has been requested correctly and the details of the appointment.
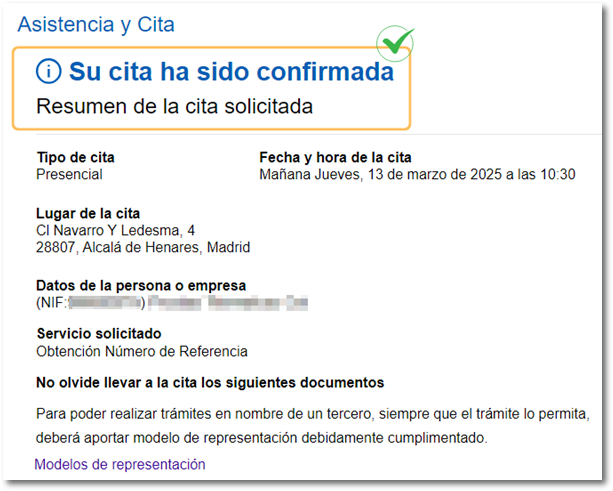
Once confirmed, you will receive an email at the address you indicated. Please keep this email as it will allow you to manage your appointment in case you need to modify or cancel it.
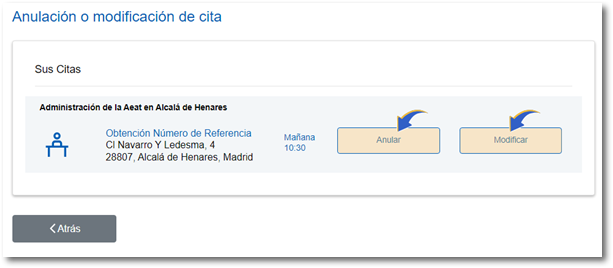
It is also possible to modify or cancel the appointment by accessing the appointment request again and clicking on the link "Do you already have an appointment?" You can cancel or modify your appointment." To do this, you will need to identify yourself with Cl@ve or with a certificate or electronic DNI .