Request for an appointment online
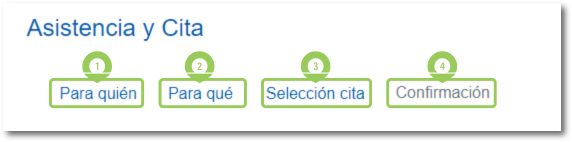
Requesting an appointment through the electronic office consists of four steps:
STEP 1. For whom
If the procedure you are going to carry out is for yourself, select the option "The appointment is for me". The appointment request does not require any specific identification system. Simply enter your NIF , first and last name and click "Next".
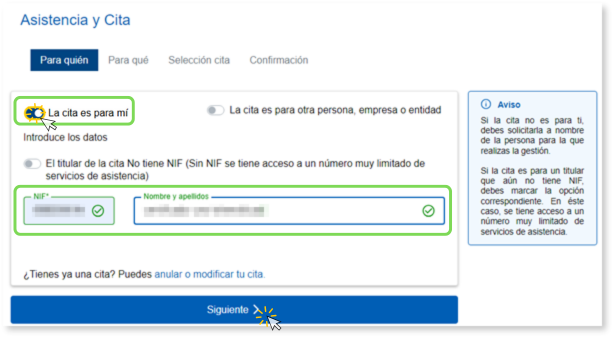
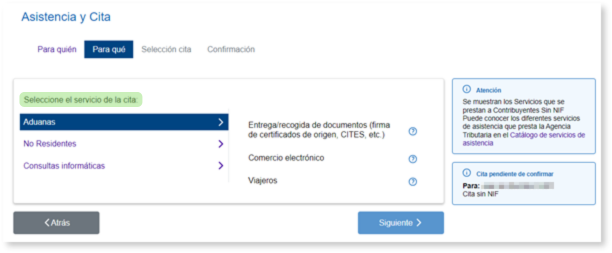
The attendance and appointment app also offers the option "The appointment holder does not have NIF" for those situations in which the taxpayer does not have NIF. However, the number of services offering this alternative is limited; Specifically, assistance with computer queries and specific services for Non-Residents and Customs, which we show you in the following image.

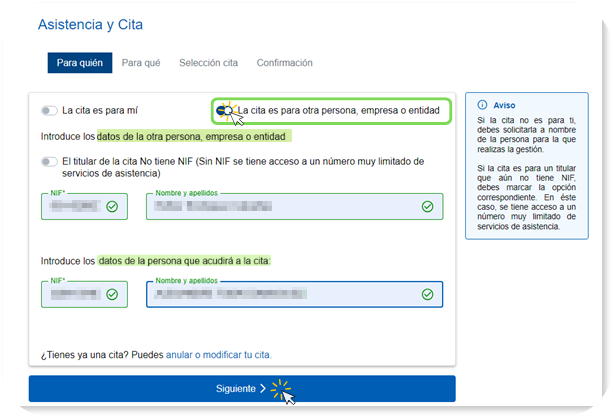
If the appointment is for a third party, select the option "The appointment is for another person or a company." In this case, you must indicate the details of the person or company for whom the appointment is and the details of the person who will attend on their behalf.
STEP 2. So that
If you have received a notification or communication from the Tax Agency, for the processing of which you wish to request an appointment, select the option "I have received a letter" and provide the 16-character Secure Verification Code that appears at the bottom of the letter.
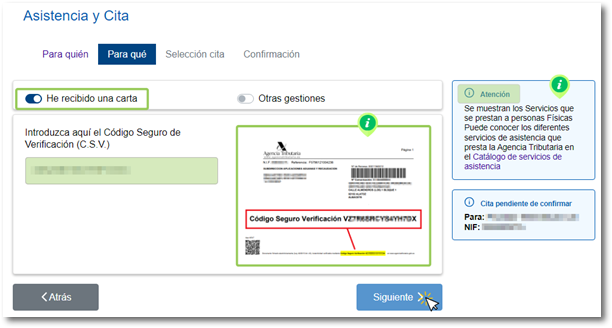
If when requesting an appointment with CSV If the procedure is not available, a message will be displayed indicating this situation, and in that case, you must select the corresponding service.
If you do not have CSV or the service is not available with CSV , select "Other services" and directly choose the service from those available in the list.
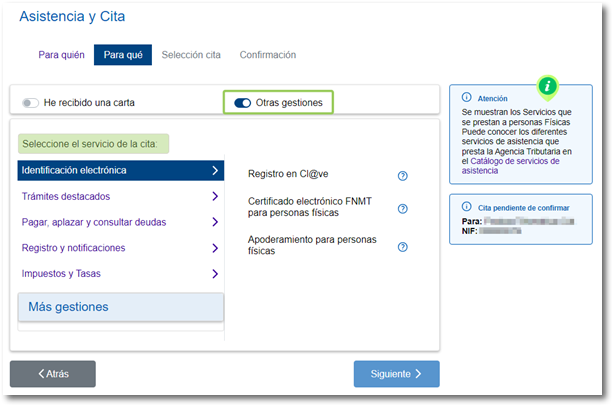
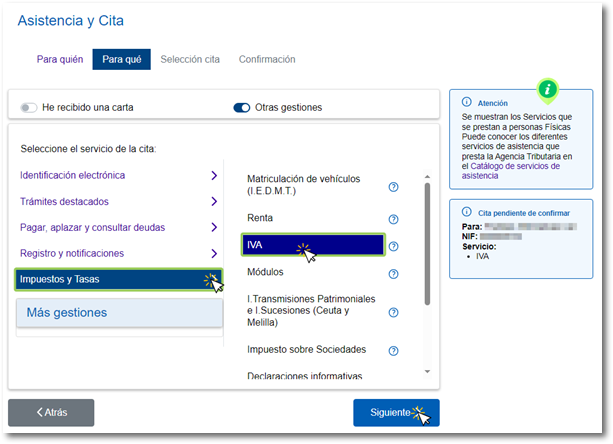
The services are shown grouped into categories. Choose the service you need to use. Once selected, you will see that the box on the right-hand side includes the service for which you are requesting an appointment along with your details. Click "Next" to continue.
STEP 3. Appointment Selection
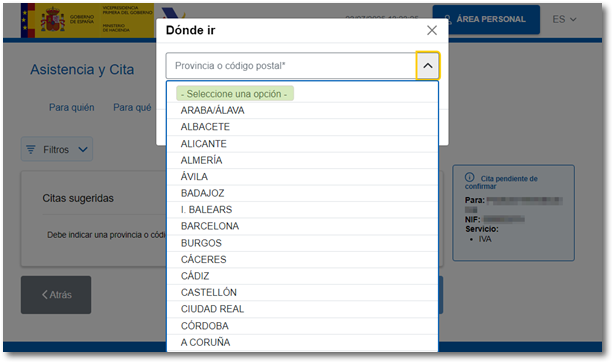
Choose the Tax Agency office you wish to visit. To do this, select the province from the drop-down menu or enter the postal code.
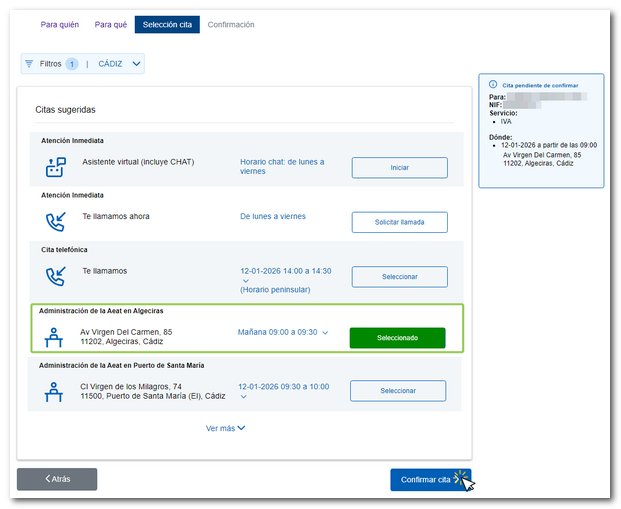
The available services will be displayed based on the data specified in the "For whom" tab, in addition to selecting an appointment to visit an office of the AEAT You can opt for appointments with immediate attention, such as a telephone appointment with a specialist or virtual assistance with personalized chat; in addition, depending on availability, you will have the possibility of selecting an appointment to go to an office on the same day of the request. Click "See more" to review the full list.
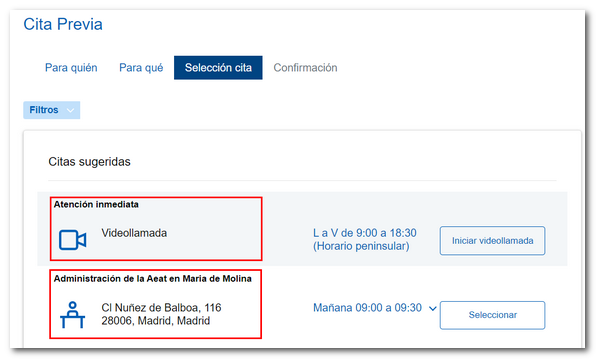
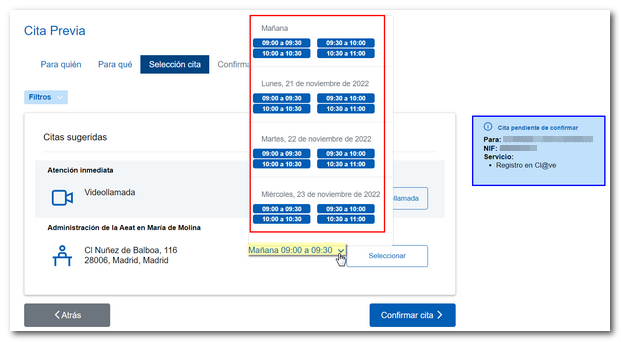
Select the option you prefer and click on the date and time. A pop-up window will open with the available days and time slots.
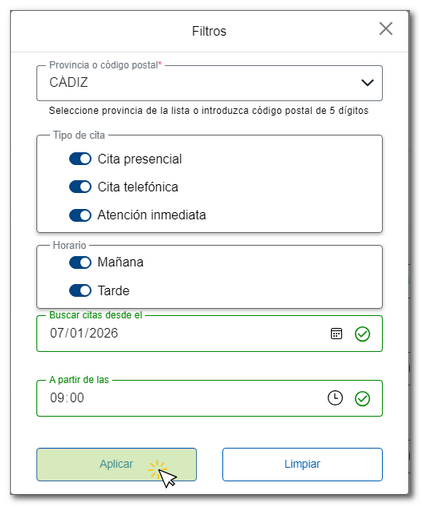
If you're not interested in the appointments suggested by the app, you can filter by province or postal code, appointment type (in-person, phone, or immediate care), morning or afternoon schedule, date, and time to find other available appointment options. Click the "Filters" drop-down menu, select your search criteria, and click "Apply."
To choose the date and time slot, click the "Select" button corresponding to the option you've chosen. The button will change color to "Selected" and the selected data will be added to the box on the right margin next to your data. Click "Confirm Appointment" to continue.
STEP 4. Confirmation
Finally, you'll need to provide and confirm a phone number (foreign numbers are accepted). It is important to indicate a valid email address as you will be sent an email with your appointment details from which you can manage it (modify and cancel), if necessary. Additionally, you can add text indicating the reason for the inquiry. Click on "Confirm".

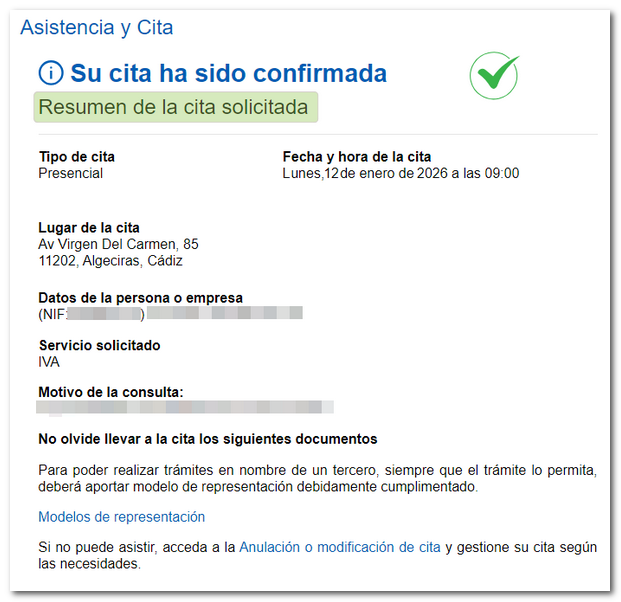
A message will be displayed informing you that the appointment has been successfully confirmed and its summary: type of appointment (in person, by phone), date and time, location, details of the person or company, service requested, reason for the consultation and information about the documentation you should bring to the appointment. Please review the details of the appointment you just obtained. If you wish to modify or cancel your appointment at this time, you will find a link at the bottom to cancel or modify it.
Once confirmed, you will receive an email at the address you indicated. Please keep this email as it will allow you to manage your appointment in case you need to modify or cancel it.
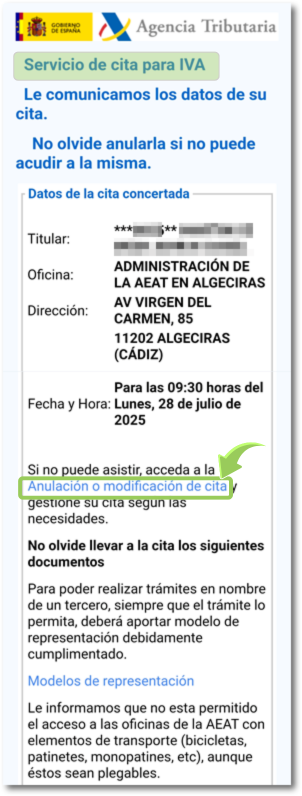
It is also possible to modify or cancel the appointment by accessing the appointment request again and clicking on the link "Do you already have an appointment?" You can cancel or modify your appointment."

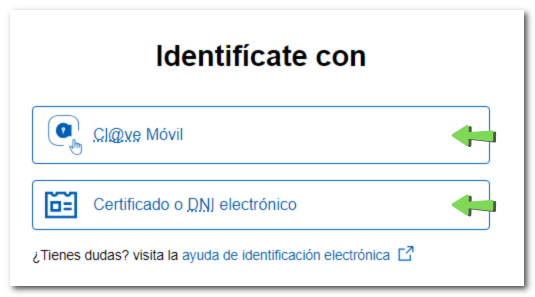
To do this, you will need to identify yourself with Cl@ve, with certificate or ID card electronic.
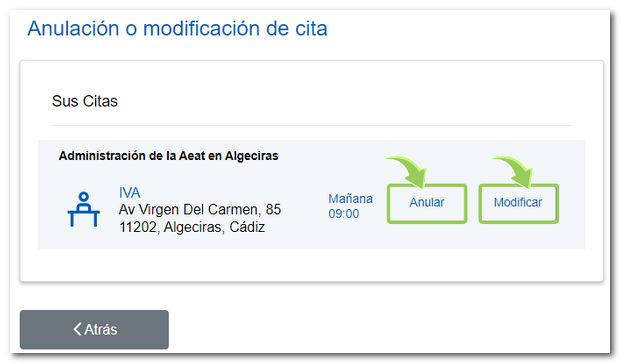
The list of appointments you have scheduled will then be displayed. Click "Edit" to change the location or date of the appointment, or "Cancel" to delete it completely.
Yeah you modify For the appointment, you will need to provide your phone number and email address again, where a reminder of the new appointment will be sent. This will allow you to manage your appointment if you need to modify or cancel it again. Also from the link "Do you already have a date?" You can cancel or modify your appointment with a certificate, DNe or Cl@ve Mobile Cl@ve accessing the appointment request again.
On the other hand, if you cancel No phone number or email address will be requested for the appointment. However, you can perform the query with a certificate. DNIe either Cl@ve Mobile Cl@ve accessing the appointment request again, from the link "Do you already have an appointment?" You can cancel or modify your appointment" or from the email you received when you requested it and verify that you do not have any pending appointments.