Free VERI*FACTU application from the AEAT
Skip information indexIssuing invoices
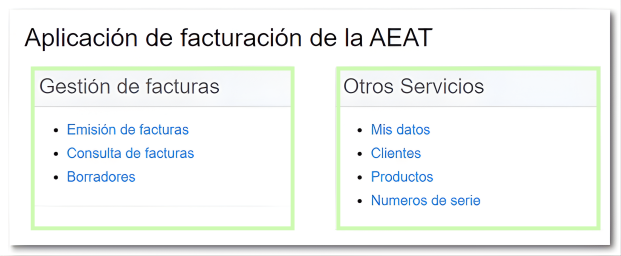
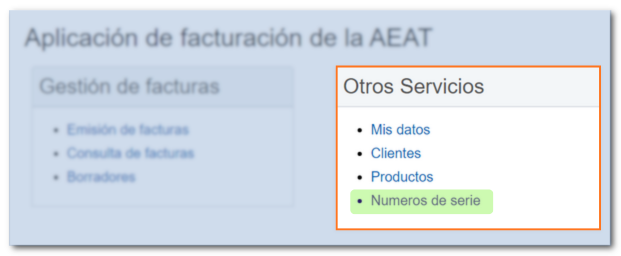
In the main menu of the billing application, in the section "Other services"You have different options to manage and save data before generating invoices, so you don't have to manually enter this information on each invoice.
From the option "My Data"You can fill in your information in the"Issuer Modification Form"and this will be transferred automatically every time you generate a new invoice. If you select "Individual" you can also include your "Business Name" in the corresponding box.

Also, in the "My data" form you have three sections to include information: "Add contact details", "Add business or sector-specific details" and "Add payment details".
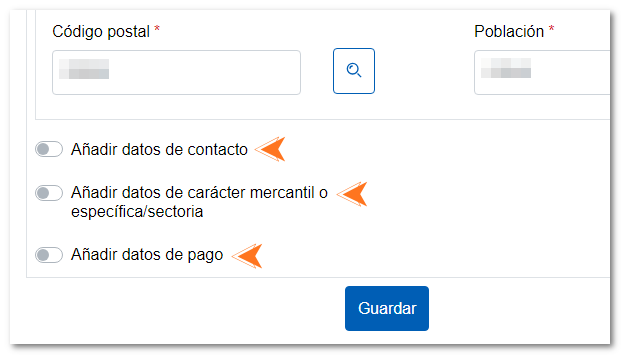
- Add contact details: You can provide an email address, contact phone number, and website.
- Add commercial or sector-specific data: You can include the registration details, whether it is a single-person entity or specific to the issuer.
- Add payment details: to specify the payment method, the bank account (IBAN) where the invoice payment will be received, if it is by direct debit or bank transfer, and include any comments you wish.
Similarly, from the "Customers", "Products" and "Serial numbers", you can add and save the corresponding information, so you can reuse it when issuing each invoice, thus saving time on completion.
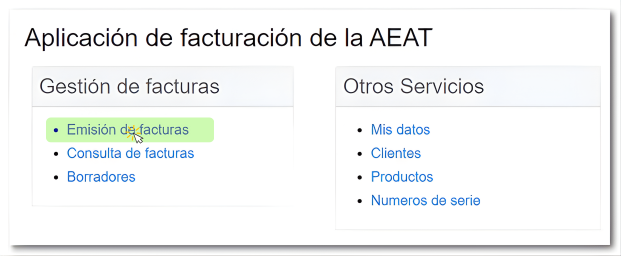
To create a new invoice, in the "Management" section of the main menu, click "Issuing Invoices."
The process for issuing an invoice is carried out in three steps:
-
Complete the application. Enter the sender, recipient, and invoice details.

-
You can save a draft to continue the process later if needed. Please note that unused drafts will expire after four months.
-
Sign and submit application. Click on "Validate/Generate Invoice" to check for possible errors or incomplete fields.

If everything is correct, all the completed data will be displayed and you will be able to preview the invoice in PDF. Review the data and, if you are satisfied with the information entered, click "Sign and send" to register the invoice.
-
Presentation receipt. Download the invoice issued in PDF as proof of submission.

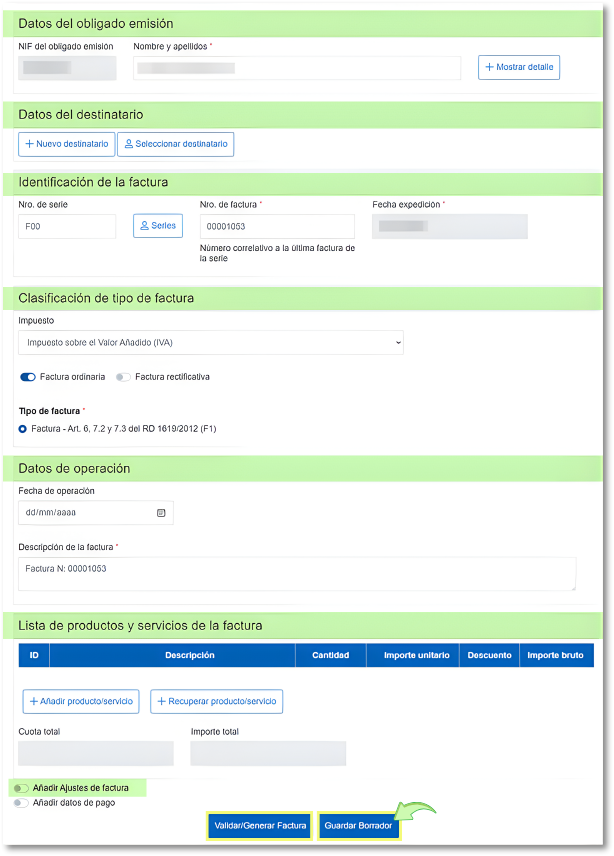
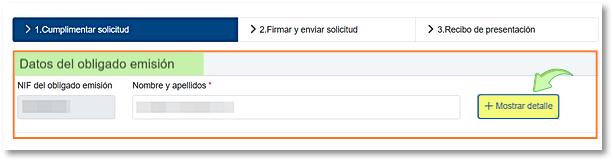
To issue an invoice, the first section you must complete is "Data of the person obliged to issue".
If you have already previously completed the section "My data", the fields will be automatically filled in.
Otherwise, or if you need to modify them, click on "Show detail".
Select whether the issuer is an individual or legal entity and complete the remaining fields corresponding to the address. Optionally, you can also include contact information by checking the "Add contact information".
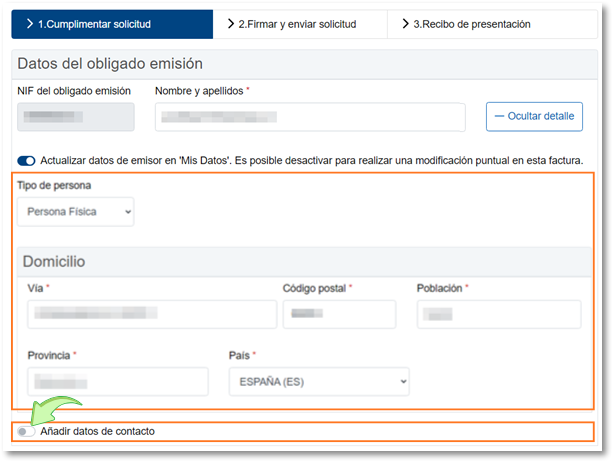
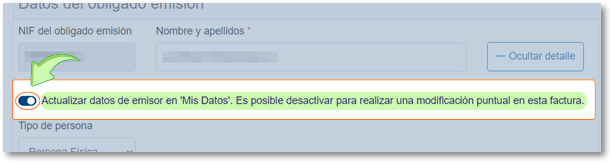
This information will be automatically saved in the "My Data" section, so it will be automatically copied to future invoices. If you do not want them to be saved, uncheck the "Update issuer information in "My Information"....
After indicating the issuer's data, complete the "Recipient information".

You have two ways to do it:
-
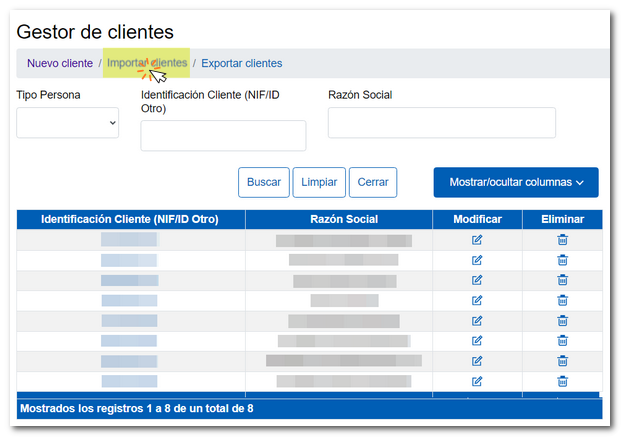
"Select recipient": to choose a client that you already have saved in the Client Manager. Click "Select Recipient" to access the Customer Manager.
From here, you can choose a client you've previously saved from the "Other Services" section, "Clients" section of the main menu, or from invoices you've previously issued. To add it, click on its ID (NIF/ID/Other) and the data will be automatically transferred to the form.
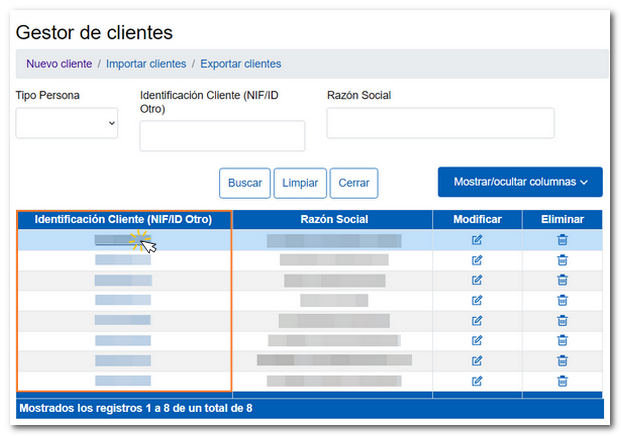
If the client you need to add to the invoice is not listed, you can create it by clicking on the "New customer". Or you can press "Import customers" to upload a file with the list of your clients, which complies with the corresponding structure.
-
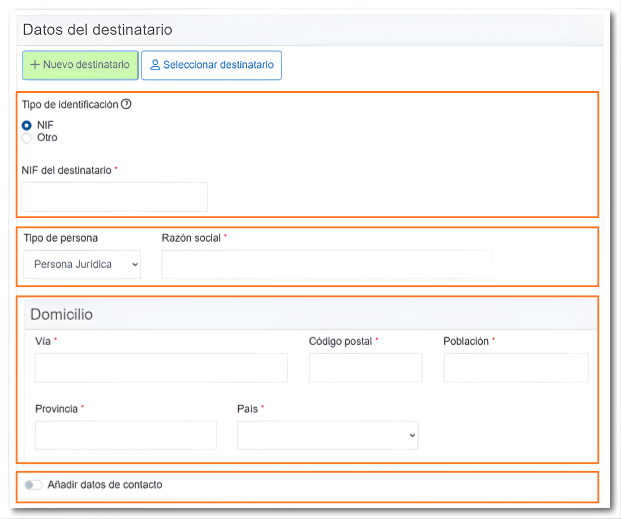
Add "New recipient": To manually enter a new customer's data, complete the following fields:
-
Type of identification: select if you have NIF or other type of identification.
-
Type of person: indicate whether it is a natural or legal person, and add the corresponding identification data.
-
Address : enter the recipient's full address. The fields "Province" and "Postal Code" will not be mandatory when the country of residence is not Spain.
-
Contact information (optional): You can include their email, phone number and/or website.
-
After indicating the sender and recipient details, complete the invoice type classification and invoice identification data.
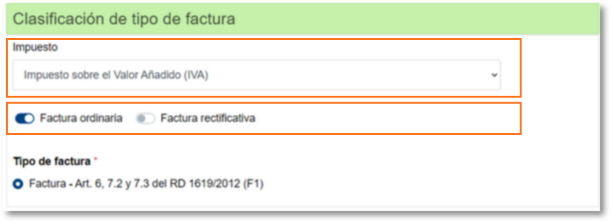
Regarding the classification of the invoice in the section "Invoice type", you must provide the following information:
-
Tax: choose the option from the drop-down menu that corresponds to your invoice.
-
Invoice type: select if it is a standard invoice (F1), corrective (R1, R2, R3 or R4) or substitute for simplified invoice (F3). If you select "Correcting invoice", a new section will open where you must indicate a series of data to define the characteristics of the invoice and you will be able to see the list of rectified invoices.
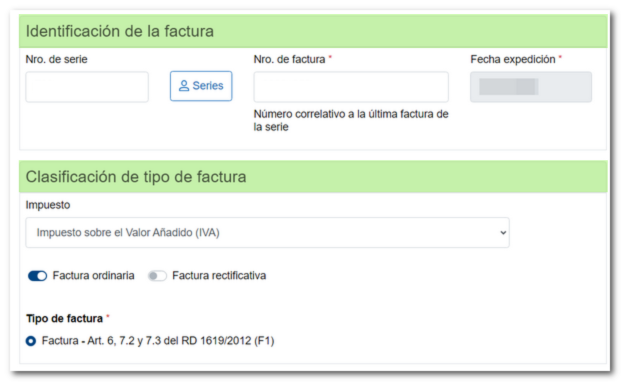
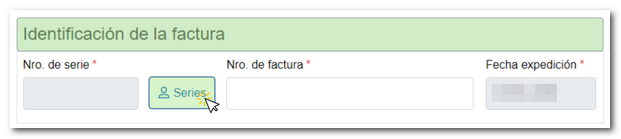
Regarding the data in the section "Invoice identification", three fields are completed:
-
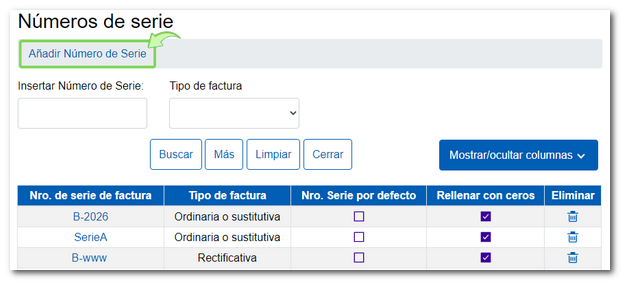
Serial number: This box is not editable and will appear in gray; To complete it, click on the "Series" button and the "Serial Numbers" manager window will open so that you can select the serial number that you will have previously created from the "Other Management" section, "Serial Numbers". It is mandatory to generate at least one series for ordinary or substitute invoices and another series for corrective invoices, in order to comply with the obligation established in the Billing Obligations Regulation, regarding the sequential numbering of invoices (articles 6.1.ay 7.1.a).
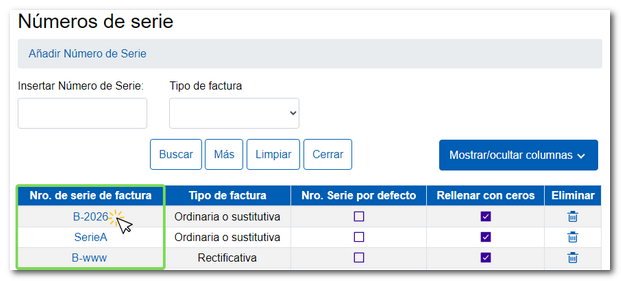
To generate and manage serial numbers and invoices, go to the "Serial Number Management", either from the option"Serial numbers" from the "Other services" section of the main menu; or from the application itself, by pressing the button "Series"and in the new window by clicking on "Add Serial Number". With this tool, you can group your invoices by serial number and generate invoices consecutive to the last one generated.
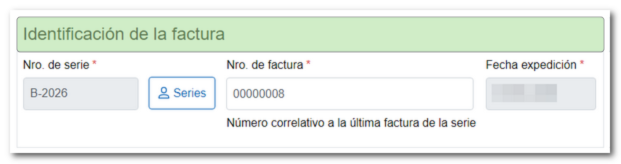
-
Invoice number: The invoice number will be automatically filled in with the consecutive number corresponding to the last serial number used. If it is the first invoice in the series, the system will automatically fill the field with 00000001. However, you can also enter another number, as long as it is not duplicated. Please note that the invoice number must be exclusively numeric, without letters or symbols.
-
Date of issue: The application automatically assigns the date of the day on which the invoice is registered in the system. Non-editable field.
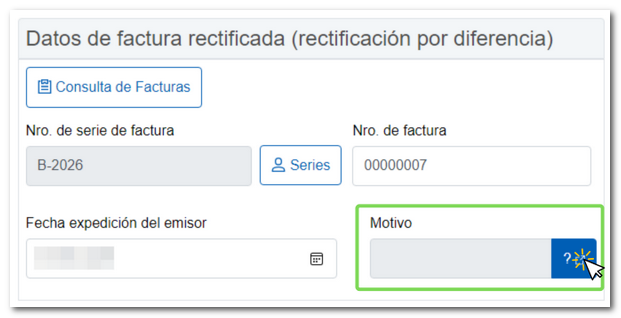
When you select "Correcting invoice", in the section "Invoice type", a new section is enabled called "Rectified invoice data (correction due to difference)" which you must complete with the details of the original invoice that is being corrected. You can correct one or more invoices by adding them to the list.
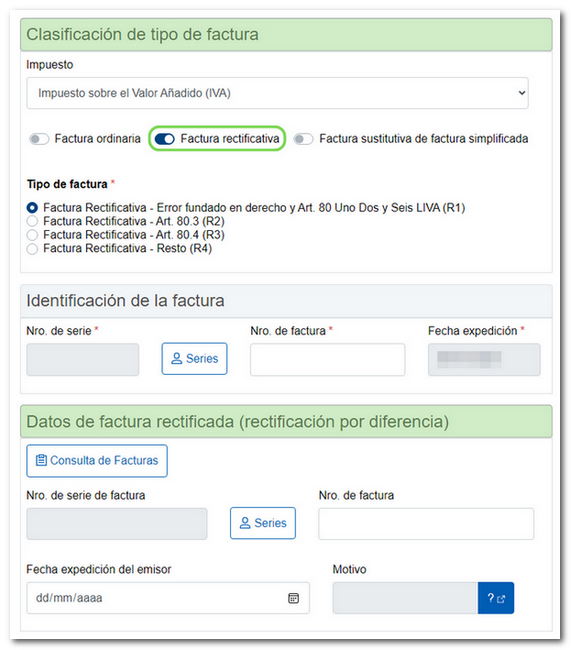
Once the "Corrective invoice" option is selected, mark the invoice type from those available (R1, R2, R3 and R4); Next, in "Invoice Identification" click on the "Series" button and in the serial number manager window choose the series of the corrective type that you have created. The issue date is automatically filled in with the date the invoice is registered in the system.
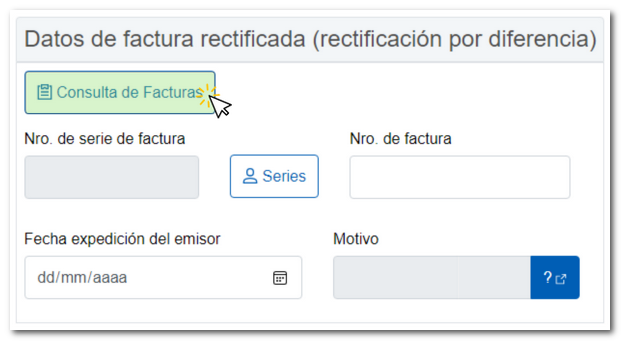
In the section "Rectified invoice data (rectification due to difference)"You must fill in the boxes corresponding to the details of the original invoice that you are going to correct." To help you find the invoice you wish to correct, you can use the "Invoice Inquiry" button.
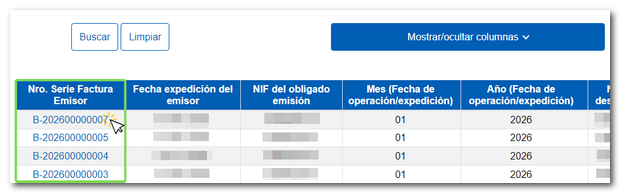
In the new window, fill in the necessary fields to filter the search; the fields "Year (Operation/Shipping Date)" and "Month (Operation/Shipping Date)" are mandatory. The remaining fields are optional. Once you have set your search criteria, click on "Search".

At the bottom, the list of invoices found will be displayed; click on the code of the "No." "Invoice Series Issuer" that corresponds and the data will be inserted in each corresponding field.
However, you can fill out the form directly if you already know all the information. Press the "Series" button to select the series that corresponds to the original invoice you are going to correct. The invoice number field is editable; Then, fill in the issuer's issue date.
To create a list of the invoices you are going to correct, press the "Add" button on each of the selected invoices and they will be added to the list. You can correct one or more invoices at the same time.
In the section "Transaction details"You can report on the date of operation (optional information), and indicate a description of the invoice or transactions that you are going to issue (mandatory data).

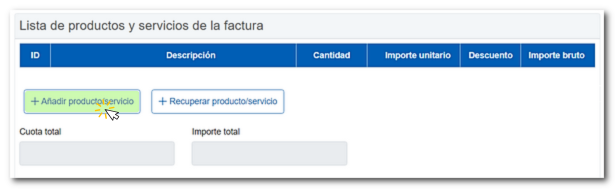
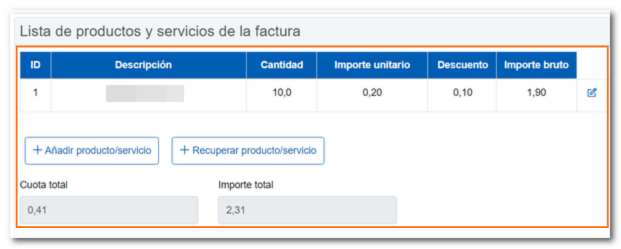
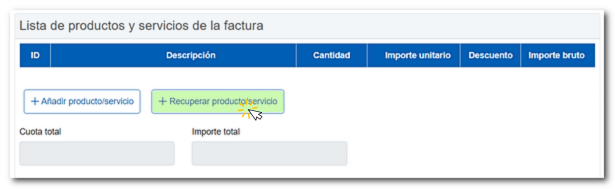
To add the list of products or services included in the invoice, you have two options:
Add product/service
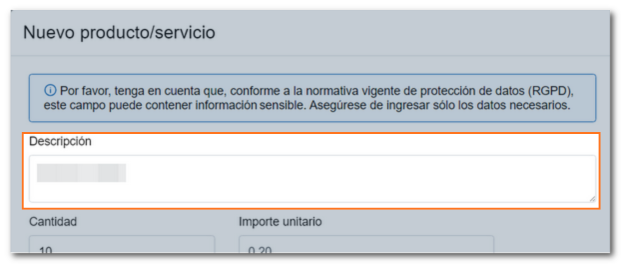
Clicking on this button will open a new window in which you must complete the following fields:
-
-
Description: name or characteristics of the product or service.
-
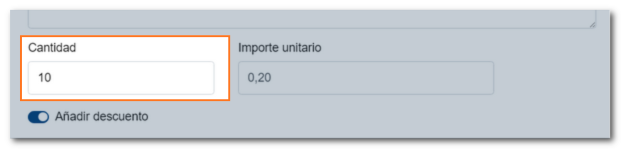
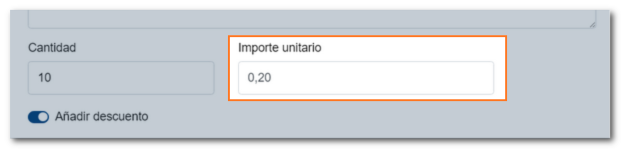
Amount: number of units or volume of service provided.
-
Unit amount: price per unit or measure (without taxes).
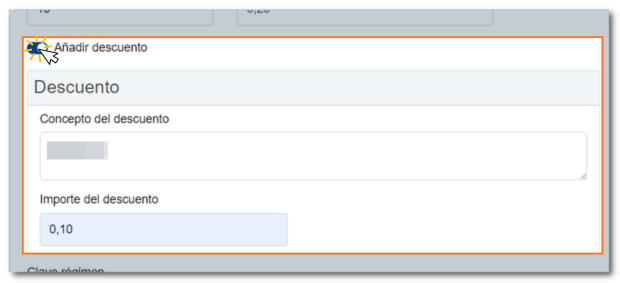
- Discount: option to apply a discount before calculating taxes.
-
Regime key: code that identifies the applicable tax regime.

-
Operation rating: specific classification according to tax or accounting treatment.
-
Cause of exempt operation: reason for tax exemption, if applicable.
-
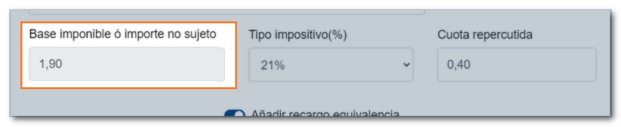
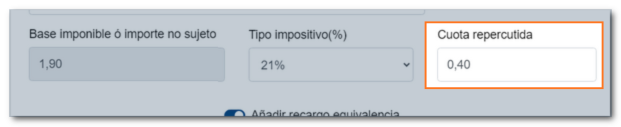
Taxable base / Amount not subject to tax: value on which taxes are applied or amount not taxed. This field is automatically filled in based on the quantity and unit amount indicated.
-
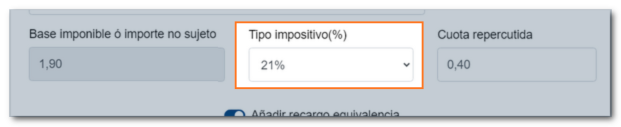
Tax rate: percentage of the applicable tax.
-
Passed-on fee: amount of tax calculated on the taxable base.
-
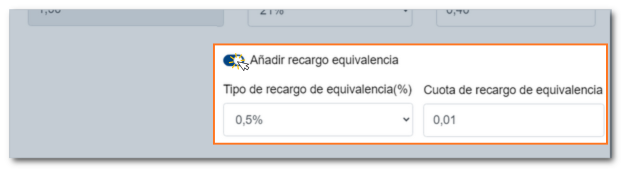
Equivalence surcharge: option to apply it when appropriate.
-
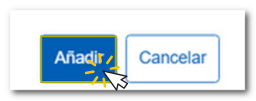
Once completed, press "Add" to add them to the list.
Recover product/service
It allows you to reuse products or services already registered in the Product/Service Manager, without having to fill in the data again. Clicking this option will open a window where you can select the desired product or service.

Additionally, it is possible to add data regarding invoice adjustments and payment details.

-
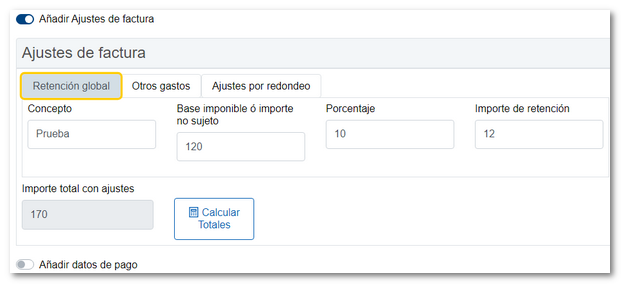
In the section "Add Billing Settings"We find 3 tabs:
-
Global retention
-
- Concept: In this field you can indicate the concept to which the adjustment refers.
- Percentage: In cases where the recipient of the transaction must retain an amount from the invoiced transaction, the issuer may reflect this amount here.
- Withholding amount: This field is automatically calculated based on the percentage you enter in the box above and the total invoice amount.
-
-
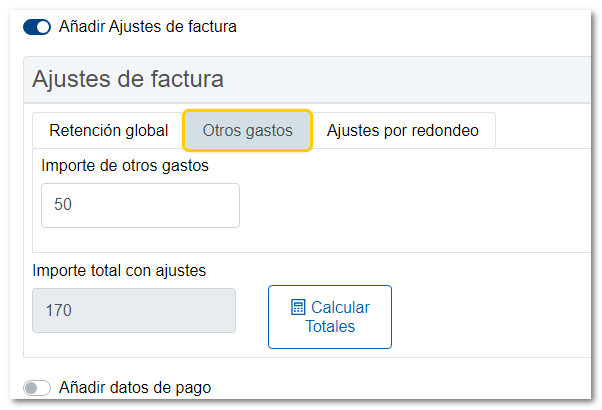
Other expenses
In this tab, you have a box to fill in the amount in euros you consider appropriate for other additional expenses.
-
Rounding adjustments
A limit of 1% is set with a maximum of +/-1 euro. If it exceeds that threshold, it adjusts automatically.
If you later make a change to any of the fields that the "Total amount with adjustments" box depends on, press the "Calculate Totals" button to recalculate the total amount with adjustments.
-
-
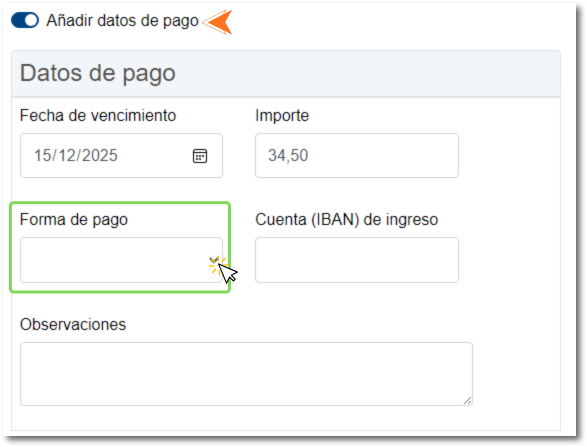
The section "Add payment details" It is optional.
In this section, you have several fields to provide information on how the invoice will be paid:
- Expiration date: Date on which the deadline for payment of the debt expires.
- Amount: Amount of the invoice to be paid with said payment method.
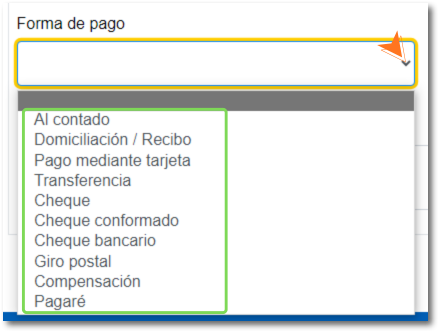
- Way to pay: When you click on it, a drop-down menu opens where you can select the chosen payment method.
- Account (IBAN) of income: This box is filled in to indicate the bank account (IBAN) where the invoice payment will be received, in case of direct debit or bank transfer.
- Observations: It is a field to add extra information.
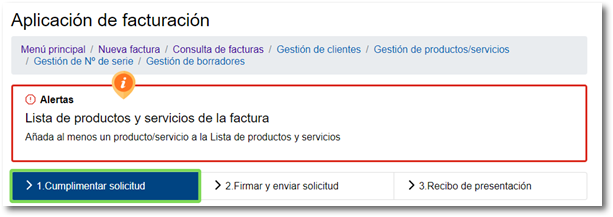
Once the invoice data has been completed in the step "1. Fill out the application" click the button "Validate/Generate Invoice".

If the invoice contains errors, a notice will appear at the top of the page informing you of the field you need to check and correct to continue.
In this window, you also have the option to save a draft by clicking the "Save Draft" button. This will allow you to continue completing the invoice at a later time by accessing it from the "Drafts" option in the application's main menu or from the "Draft Management" tab when creating a new invoice.
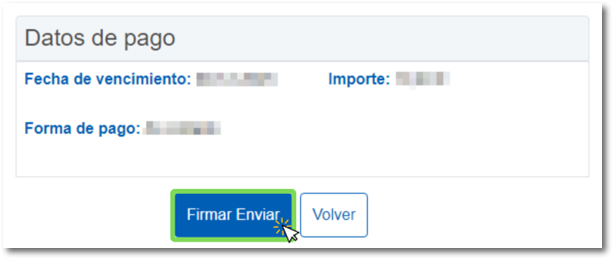
If the validation is correct, the next step opens: "2.Sign and submit application"All the completed data is displayed so you can confirm the information with which the invoice will be issued. You can also generate a draft invoice in format PDF to view it before proceeding with the final broadcast by clicking on "Preview PDF".

If you need to make any changes, press the "Back" button and if you are happy with the data entered, press the "Sign Send" at the end of the form.
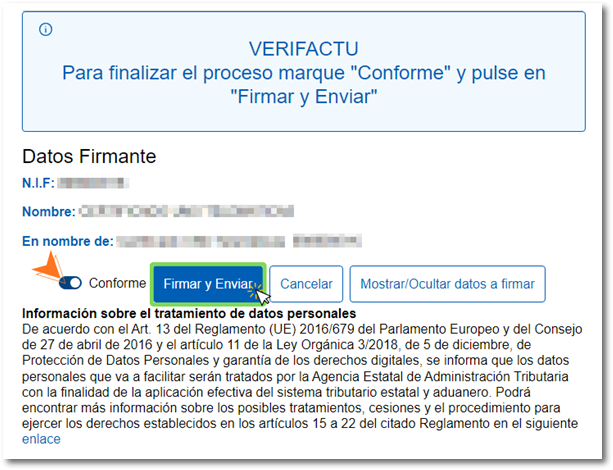
Then the confirmation window opens, check the box "According" and press "Sign and Send". Additionally, you have the options to cancel the submission and show/hide the details you are signing.
Finally, the step " is shown3. Presentation receipt"verifying that the process has been carried out correctly.

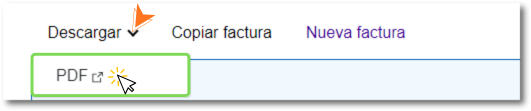
In this step you can obtain the invoice issued in PDF by clicking on "Discharge".
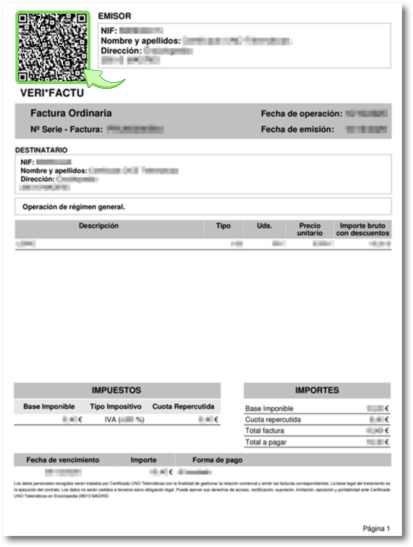
On the printable invoice in PDF A QR code is incorporated that you can read with the camera of a mobile device that allows it, with a QR code reader and with the APP AEAT and thus link to the URL that confirms that it is an invoice incorporated into the system.

The billing application published by the AEAT Its electronic headquarters operates in a real environment and the invoices completed and issued from this application will be real and have tax implications. Invoices issued from the app can be voided from the invoice view if they are considered to be erroneous invoices that should not have been issued.
However, if you wish to run tests, you can access the version of the application published on the external testing portal (which is a testing environment where invoices issued here will not have tax implications). Therefore, it is very important to distinguish from which of the two environments the application is accessed.
Currently the only invoice download format that the application allows is in PDF.