Form 130
Skip information indexElectronic filing of form 130
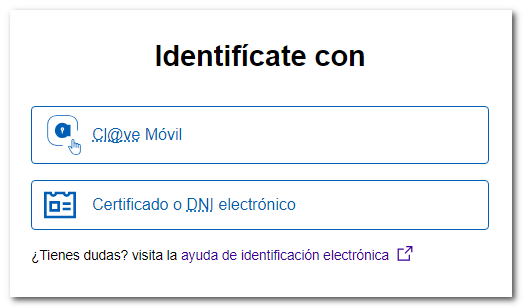
You can access by identifying yourself with Cl@ve , certificate or DNI electronic. If you have questions about how to obtain an electronic certificate or how to register in the Cl@ve system, consult the information available in the related content.
If you choose to identify yourself with Cl@ve after indicating the DNI / NIE you must also provide the required verification data based on your document number: validity date for DNI , issue date for DNI permanent or support number in case of NIE . Then press "Continue". Confirm authentication in Cl@ve in the APP or view or receive the PIN on your mobile device. If you have the APP Cl@ve You also have the link "Access with Cl@ve Mobile Cl@ve via code QR"to scan the code QR that is offered on the web to confirm authentication Cl@ve.
If the declarant does not have an electronic certificate, it is necessary that the person making the submission be authorized to submit declarations on behalf of third parties, either by being registered as a collaborator or by being authorized to carry out this procedure.
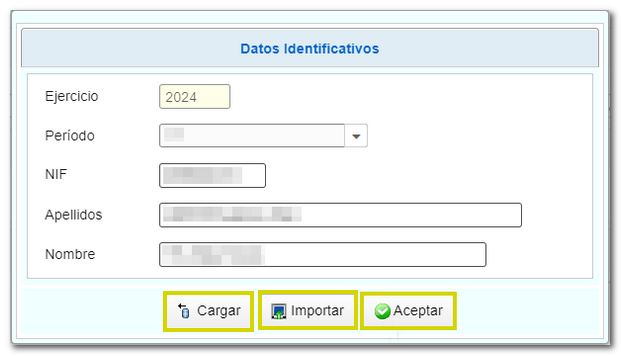
Fill in the taxpayer's identification details and indicate the tax return period, then click "Accept" to start a new return. However, if you have previously completed and saved a declaration on the AEAT server and wish to retrieve the data, press the "Upload" button. You can also import a file created with an external program that conforms to the current registration design or import the file created with the form and obtained using the "Export" button when accessing "Formalize Income / Refund".
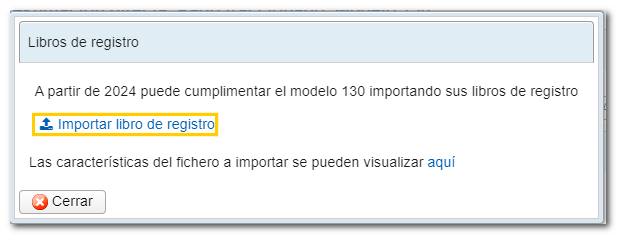
Below, it is reported that it is possible to import Registration Books to complete form 130. If you have the file with the logbooks, click "Import logbook", select the file and then the system will show you the result of the import. If you do not have a registration book, click "Close" and you will access the form.
It is possible that the data included in the books is not correctly recorded; in these cases, the system returns the list of errors that the taxpayer must correct.
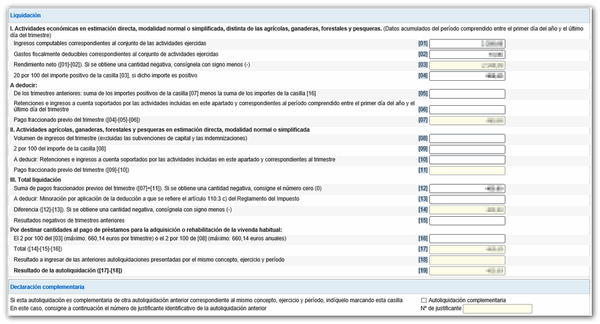
If you have imported a ledger, you will access the form with the data already filled in. Otherwise, you must fill in all the settlement data in the form. If the declaration is supplementary, check the corresponding box and indicate the supporting document number of the previous declaration.
At the bottom of the form are the buttons available in the form.
-
Show or hide information about errors or completion notices.

-
"Delete Return" deletes the data from the return you are working on to start a new one.

-
Using the " Validate declaration " button, check if you have any warnings or errors. The list of errors and warnings detected will be displayed, which you can access for correction from the "Go to Error" or "Go to Warning" button next to the description of the fault. Remember that the notices provide relevant information that should be reviewed but do not prevent the filing of the tax return. If the declaration contains errors, these must be corrected.
If no errors are detected, the description will report no errors.

-
The " Save " button allows you to store the declaration data on the AEAT servers even if it is incomplete and contains warnings or errors. If a tax return has been saved previously, it will be overwritten. When you access the form again, in the initial identification window, you will be given the option to retrieve the data with the "Load" button. You can also retrieve the saved declaration using the "Load " button located on the button bar at the bottom of the form.

-
The " Logbooks " button allows you to access existing information from a previous import or import a new logbook. If you have not yet imported a logbook, the system will offer you the option to import it now and if you already have an imported logbook, importing a new one will replace the one already uploaded, view or download the last imported logbook and even delete the data from the previous import by clicking "Delete logbook usage".

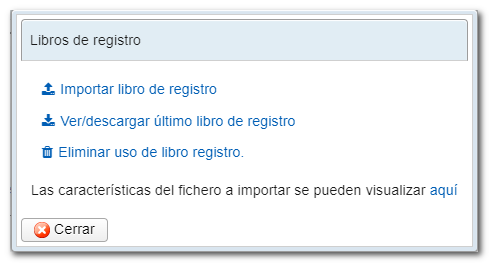
-
From " Import ", you can recover the declaration obtained through a file if it conforms to the record design published for model 130 prepared with an external program or exported from the form. Note that from this option, if there are data indicated in the form, these will be lost when the file is imported.

-
Use the " Formalize Income/Refund " button to submit the declaration once it has been completed and validated.

Using the button Export, you will get a file in the format BOE which you can import back into the form and which is valid for submission. The file name is made up of the NIF of the declarant, the exercise, the period and by the extension.130.
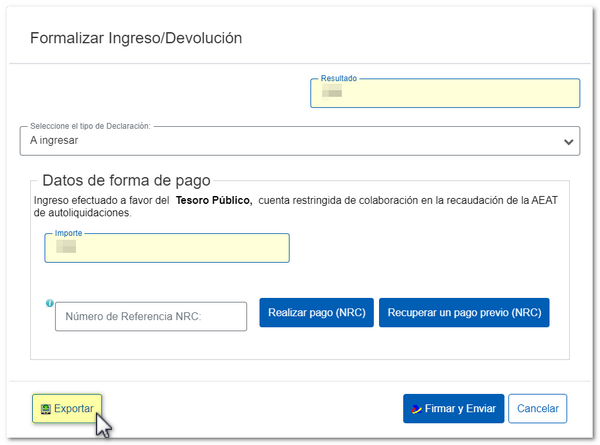
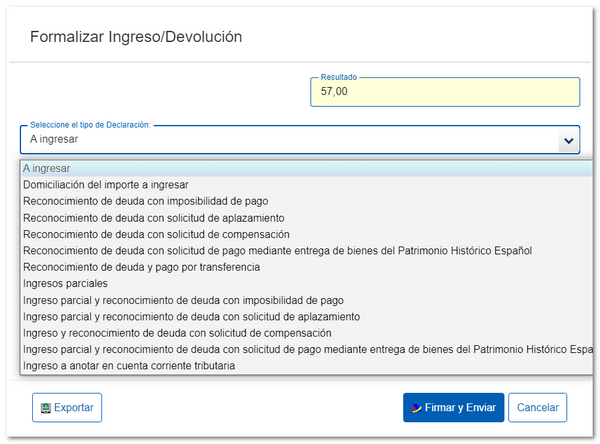
In declarations with a positive result, select the type of declaration from the available options (to be paid, direct debit, acknowledgment of debt, etc.).
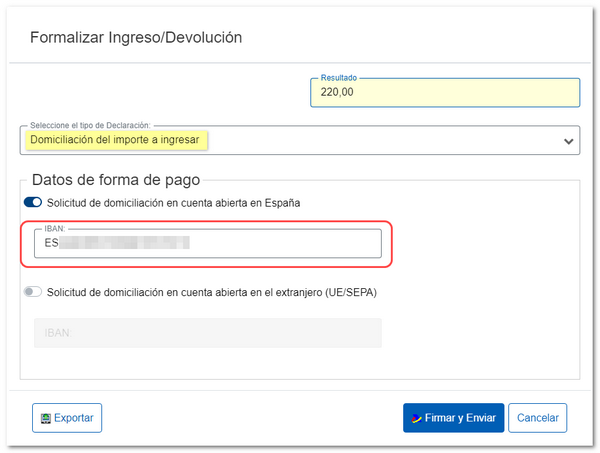
You can select the option Direct debit of the amount to be paid and indicate the IBAN of the account where you want the direct debit to be made.
NOTE : Consult the taxpayer calendar for the direct debit deadlines for each period.
If you select the option To enter You will need to make the payment and obtain the NRC (Complete 22-character Reference Number that serves as proof of payment).
In the same window you will find the button "Make payment (NRC)", which links directly to the payment gateway to make the payment by debiting the account, or by card or Bizum.
You can also make the payment through the self-assessment payment procedures available on the Electronic Office website. AEAT or through the options offered by your bank.
The option "Recover a previous payment (NRC)" allows to recover a NRC of a payment made previously and which you wish to include for the self-assessment filing. This button will only be available for submissions made on one's own behalf and with power of attorney, not for social collaborators, and the details must match: model, exercise, period, NIF of the holder and amount to be deposited.
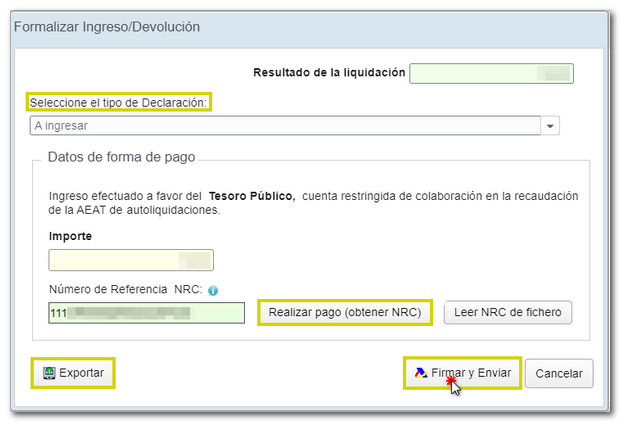
Once the payment has been made and the NRC by any of the aforementioned means, introduce the NRC in the corresponding box and press Sign and send.
Model 130 offers different debt acknowledgment options. One of them is Acknowledgment of debt and payment by transferwhich allows the use of a bank account opened in a NON-COLLABORATING Credit Institution, for example, a foreign account.
NOTE : Immediate transfers are not accepted.
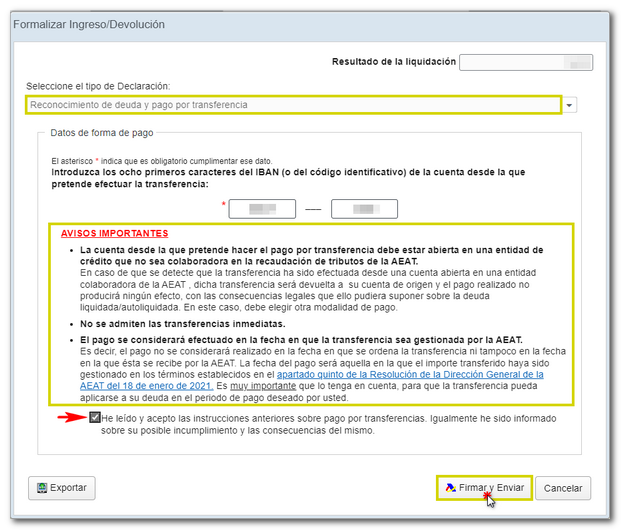
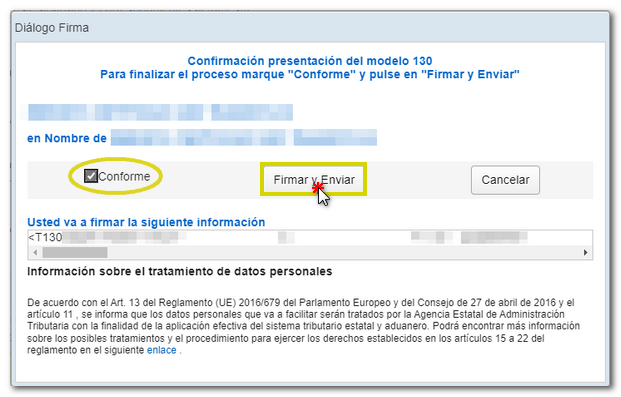
Once you have selected the appropriate income type and completed the necessary information, click on Sign and send. A window will appear with the encoded declaration information and the data of the filer and the declarant. Check the box According and press Sign and send to conclude the presentation.
Finally, if everything is correct, you will receive the submission receipt and the PDF with the information of the presentation (registration entry number, Secure Verification Code, receipt number, date and time of presentation and presenter details) and the complete copy of the declaration.
In cases of debt acknowledgment where it is necessary to manage the debt electronically at the Electronic Office of AEATYou will find the link on the presentation receipt. Process debt, which is directly linked to the request for deferral or compensation. The settlement details will then appear with the debtor's data and the settlement key. You will have to choose between one of the available options: defer, compensate or pay.

Remember that for tax questions you can contact the pop-up icon " ADI . Do you need help?" which opens when you start filling out the form in the lower right corner, you can also contact the Tax Information number 91 554 87 70 or consult in person at your Administration or Delegation.
