Income Tax 2018
Skip the table of contentsSecurities Portfolio 2018
The Securities Portfolio app enables portfolio data to be transferred automatically to Renta Web. This data will be collected automatically via the information returns, supplemented by manual corrections made by taxpayers, which will be essential in some cases.
You can access the “Securities Portfolio Service” from the Form 100 (2018) formalities page on the Electronic Headquarters. To access your securities portfolio in your own name, use an electronic certificate, an electronic DNI, Cl@ve or your income tax reference number for the current tax year.
Securities Portfolio Interface 2018
Once you have chosen how to log in, you will be taken to the app’s main screen, which is divided into several sections: ‘Securities’, ‘Grouping’and ‘Transactions’. You also have a range of options for accessing help with the Securities Portfolio, video tutorials for the app and the colour-coded legend that indicates the status of transactions, groupings and securities.
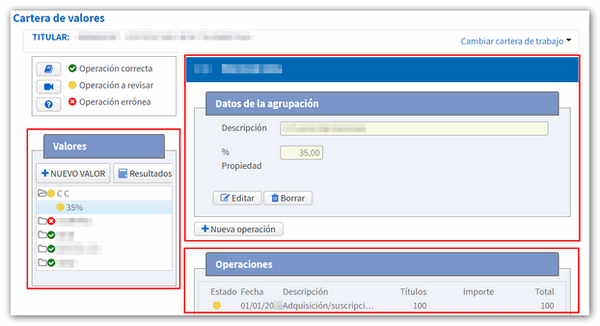
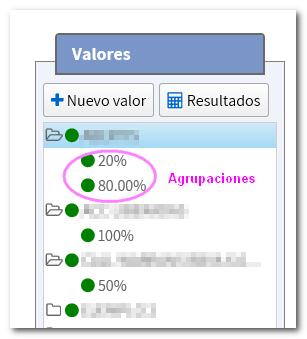
The ‘Holdings’ panel displays each holding alongside the various existing groupings, which reflect the percentage of ownership.
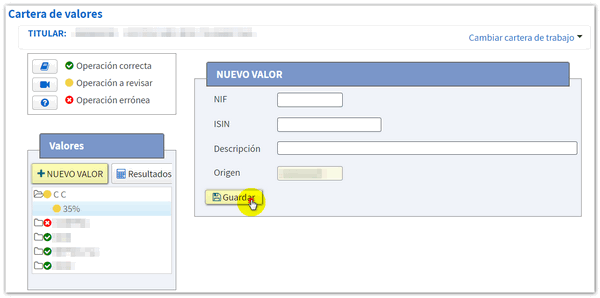
If you wish to perform a security registration, click the ‘New security’ button and enter the security’s tax identification number ( NIF ) or ISIN, along with a description. Click the "Save" button.
If you access the value details, you can edit the information or delete the value. In addition, the groupings for the security will be displayed, and you can use the ‘New grouping’ button to add groupings to the security if you hold shares in the same security but with different percentages.
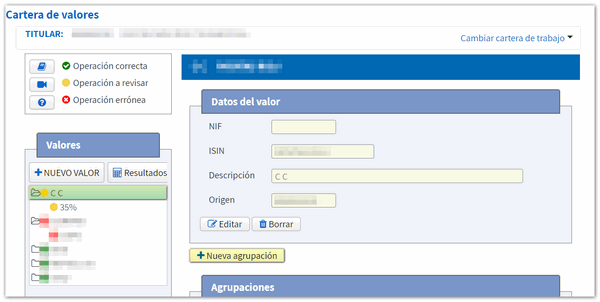
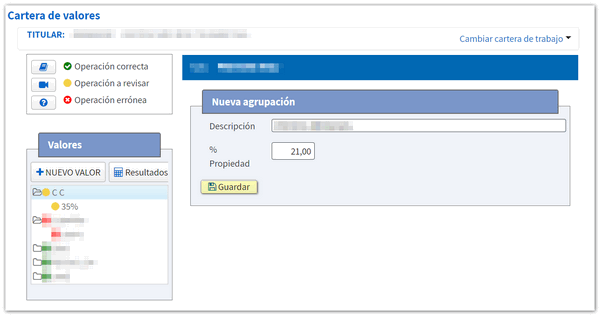
In this case, a description of the group and the percentage of ownership must be provided. Then, click the "Save" button.
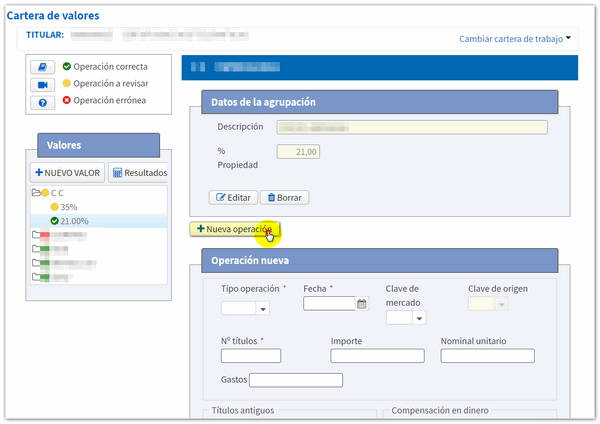
Similarly, from the details of a ‘Group’, you can perform registration of new transactions or amend transactions that have already been registered in the Securities Portfolio.
For registration of a transaction, click the ‘New transaction’ button and enter the transaction type, transaction date, market code, source code, number of securities and amount. Click 'Save' to save the record.
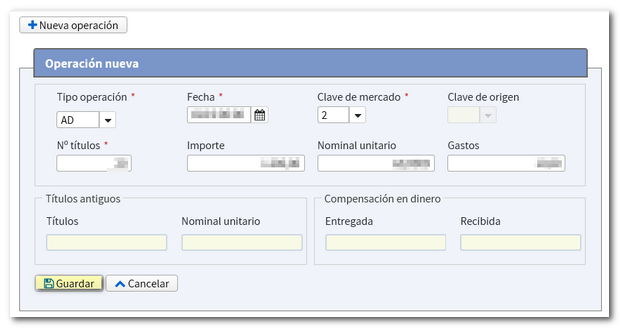
To edit a transaction, in the "Transactions" table, click on the record and the fields will be populated. Click or expand each field to edit it. If you want to delete the transaction, click the "Delete" button.
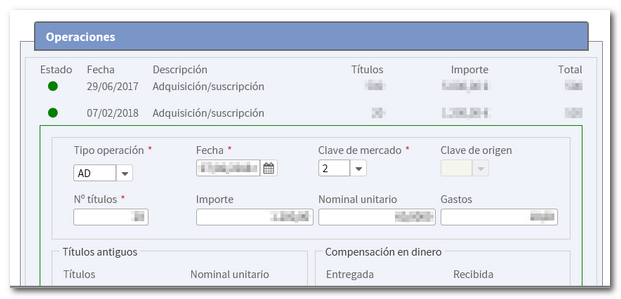
Types of transactions
The information to be uploaded to the application initially will be that collected from the informative declarations. There are some transactions that must be entered manually.
The status of transactions that have been transferred or generated manually can be identified using the following colour code:
- Red: a transaction containing errors that must be corrected to ensure the consistency of the securities portfolio, thereby enabling the data to be transferred to Renta WEB.
- Yellow: transactions with warnings that may or may not be corrected, as transfer to income tax WEB is permitted.
- Green: operation successful.
If an operation is shown in red, this means that the group and the value to which it belongs are also red. To ensure the portfolio is consistent and that the data can be transferred to income tax WEB, it is advisable to correct the first transaction marked in red, as this may automatically validate the remaining transactions.
By viewing the transaction details, you will be able to see what error has been detected.
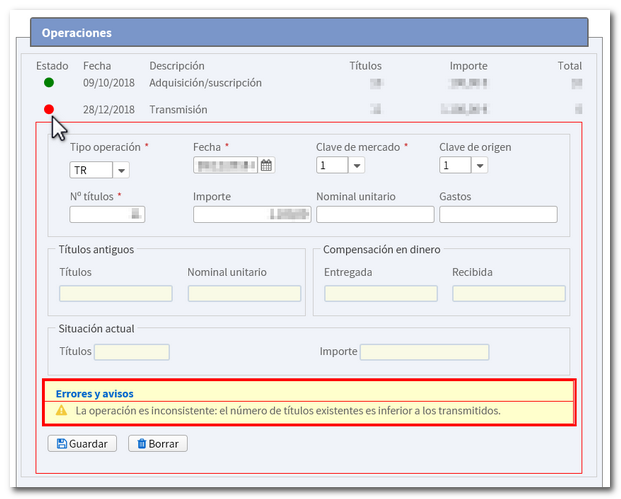
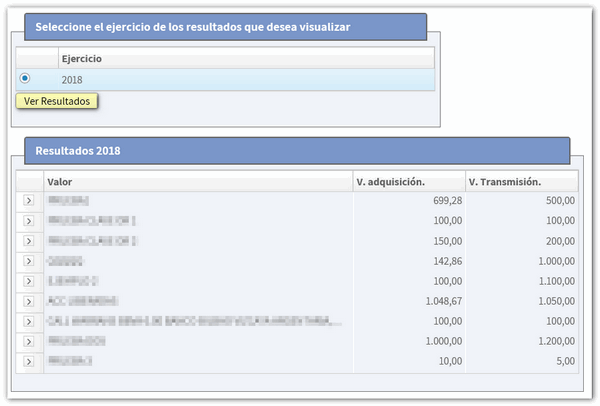
Results
Once you have finished entering and checking the data in the portfolio, you can use the ‘Results’ button to view the acquisition and transfer values calculated for the 2018 financial year. Click 'View results'.
Synchronisation with income tax WEB
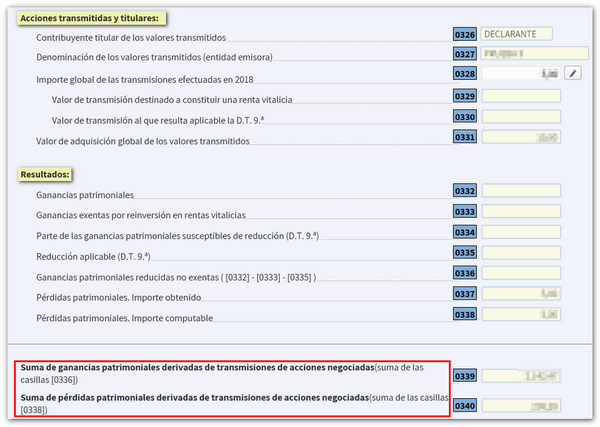
In order for the data to be transferred from Cartera de Valores to Renta WEB, as well as the portfolio having to be consistent, the relevant box must be ticked in section G2 of your tax return; this may be ticked by default depending on your tax data, or it is up to the taxpayer to decide whether or not to tick it.
If it is detected that there have been changes to the securities portfolio for that tax identification number (NIF), both applications are synchronised and the data is transferred to the tax return.
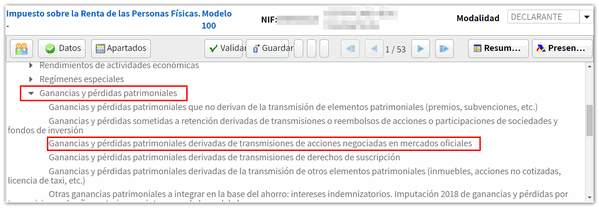

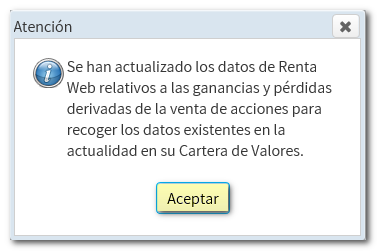
You can check in section G2 of the tax return to see whether the details have been transferred correctly.