Form 651
Skip information indexHow to electronically submit Form 651. Non-residents
Form 651 for non-residents can be submitted electronically using an electronic certificate, DNIe or Cl@ve .
The deadline for submitting Form 651 is 30 business days from the day after the act or contract was carried out.
To correctly view all parts of the form, before accessing it, it is recommended to check the zoom and font size set in the browser (once the declaration has been submitted, it will be possible to return to the previous zoom and font size).
- In Microsoft Edge , access the three horizontal dots icon, located in the upper right corner and under "Zoom" select 100% with the "+" and "-" signs, then press "Settings", "Appearance", "Fonts" and under "Font size" select "Medium (recommended)".
-
In Google Chrome , from "Settings" (by clicking on the three vertical dots at the top right of the browser), "Appearance", in "Font size" select "Medium (recommended)"; In "Page Zoom" select 100%. You can also select 100% zoom from "Zoom In/Out".
-
In Mozilla Firefox , from the three-stripe icon, in "Size" select 100% with the "+" and "-" signs; In "Options", "General", "Language and appearance" and in "Fonts and colors" select a size smaller than the current one, in case the form does not display correctly.
-
In Safari , from "View", "Zoom In" or "Zoom Out".
The presentation may be made by the taxpayer himself when he is the only one obliged to self-assess, by a person authorized by the rest of the taxpayers or by a social collaborator acting on behalf of all the taxpayers.
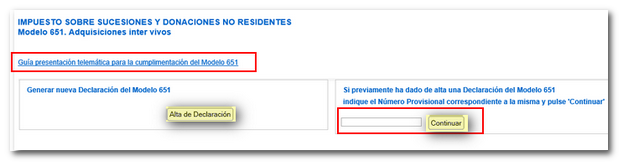
If you have any questions regarding the procedure for filing Form 651, the "Online Filing Guide for Completing Form 651" is available by clicking on the link above. This guide in PDF format contains information on applicable regulations, rules and a summary of the steps to follow to complete and print the form.
To start the declaration, press the "Submit declaration" button. If a declaration has already been previously generated with a provisional number assigned, indicate it in the corresponding box and click "Continue" to access and retrieve the data.
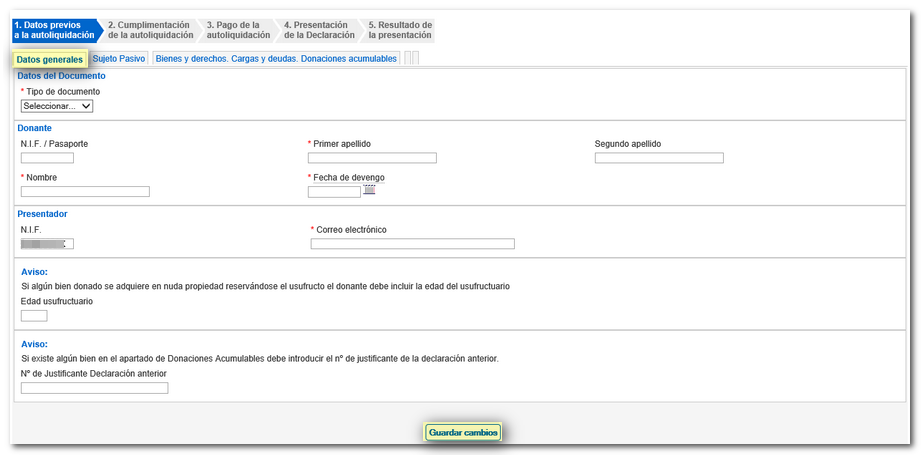
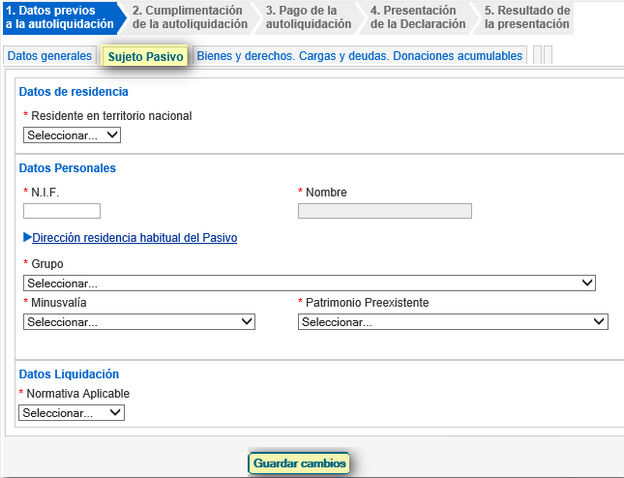
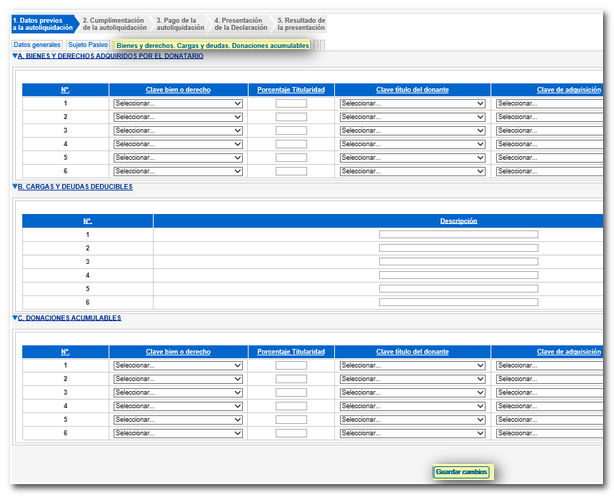
1. Data prior to self-assessments
The data prior to self-assessment are made up of 3 sections:
- General data
- Taxpayer
- Goods and rights. Burdens and debts. Cumulative donations.

Fields marked with an asterisk are mandatory. If they are not completed, the program will not allow you to advance to the next section.
It is not necessary to enter all the data and carry out all the steps in a single session, but it is necessary to at least enter the NIF of the taxpayer.
In the first tab "General information" you must specify whether it is a public or private document, the identification data of the donor, the data of the presenter and data, if applicable, of the indicated notices.
In the following tab "List of taxpayers" the data of each of the taxpayers of the tax, who subscribe to the self-assessment, will be completed, indicating whether or not they are resident in Spanish territory, personal data and the settlement data.
In the tab "Properties and rights. Burdens and debts. Accumulable donations" the following data of the assets and rights will be indicated:
- Key to good or right.
- Percentage of ownership.
- Donor title key.
- Acquisition key.
- Description of the asset or right.
- Value of the asset.
It is essential to complete section A, and sections B and C if applicable.
Before leaving the session, you must click "Save Changes" to save the data that has been included so far.
Once all the required fields have been completed, you can access the next step, "Completing the self-assessment." This option will be enabled as long as there are no errors in the previous data of the self-assessment. If there are any filling errors, they will be displayed at the top of the screen in yellow.

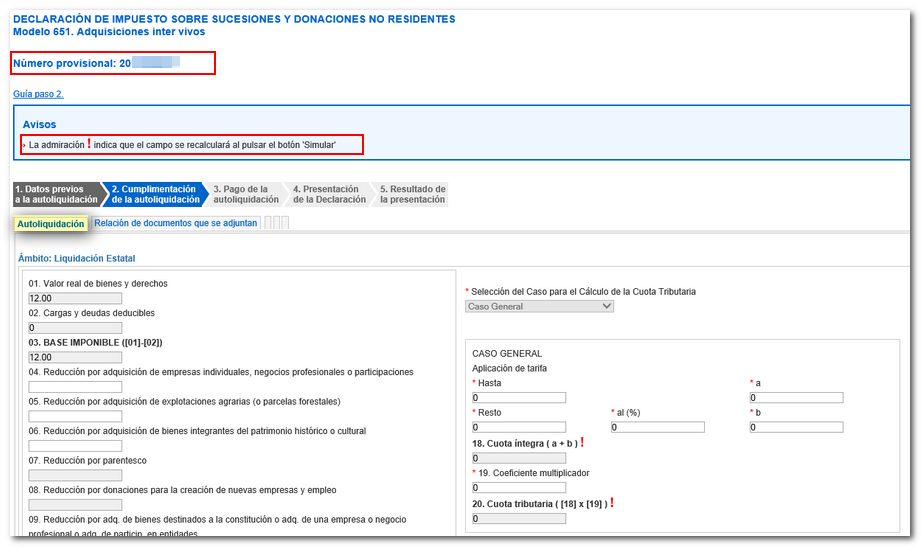
2. Completion of self-assessments
The first time changes are saved, the program will generate a Provisional Number that must be kept in order to access and recover a self-assessment that has been left incomplete and thus be able to continue completing it.
Fill in the information for section "Self-assessment" .
When you consider that all the boxes are correctly filled in, you can attach the documentation that must accompany the model by clicking on the " List of documents to be attached" tab.
To do this, you must individually mark each of the documents that are attached to the declaration and add it by clicking "Attach file". To avoid incidents, it is recommended that the files to be attached be saved in the AEAT folder on the local disk, and that they have short and simple names, without prohibited characters (symbols).
In the "Help" link: "Embeddable file types" provides information about the permitted extensions of files that can be attached.
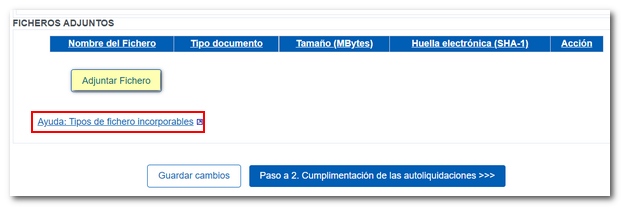
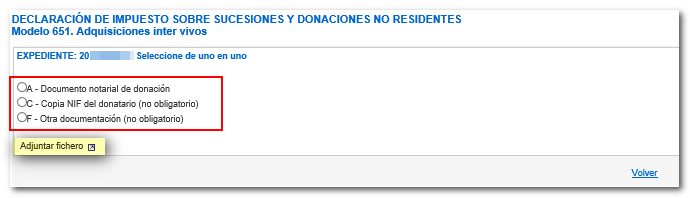
When a file has been attached it will be indicated.
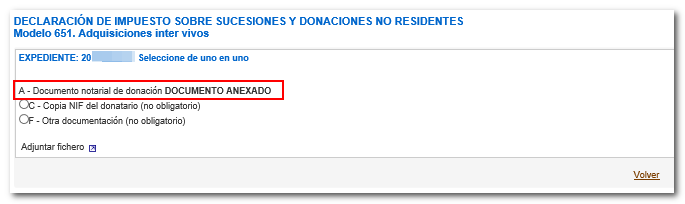
Once all documents have been attached, click "Return". The program will display the records with the attached files.
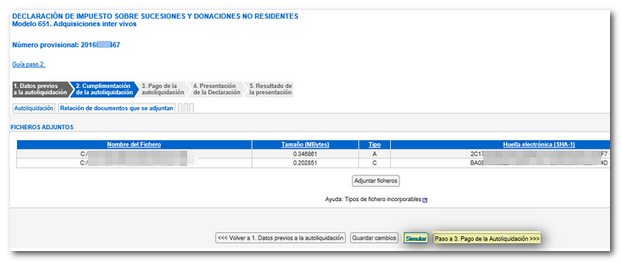
By clicking "Simulate" you will obtain a PDF , with the result of the self-assessment, which is not valid for filing. Individual self-assessments of taxpayers and the complete form will be available for viewing. Before proceeding with payment, you must consult the self-assessment by clicking the "Self-assessment simulation" button.
If the simulation is correct, you can advance to this phase by pressing "Step 3. Self-Assessment Payment".
3. Payment of self-assessments
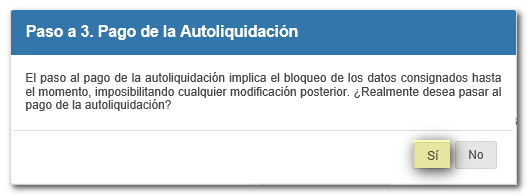
At this point, a message will be displayed warning that moving to this phase will result in the blocking of the recorded data and the impossibility of subsequent modifications.
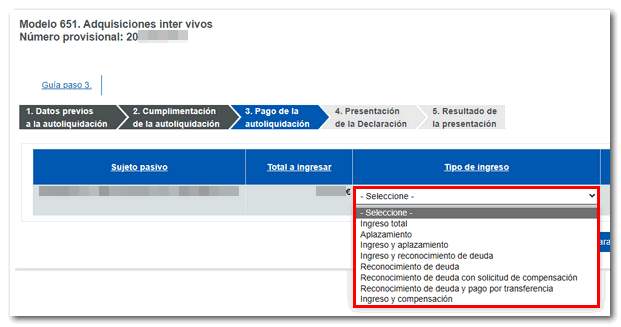
If the result of the self-assessment is a fee to be paid, the type of income must be selected from those shown (Total income, deferral, recognition of debt and payment by transfer, etc.). Depending on the type of income selected, it will be mandatory to include or not include a Complete Reference Number ( NRC ), which can be obtained directly from the Bank or through the AEAT payment gateway, by clicking the "Enter" button in the "Debit from account through AEAT (if NRC is not available)" column.
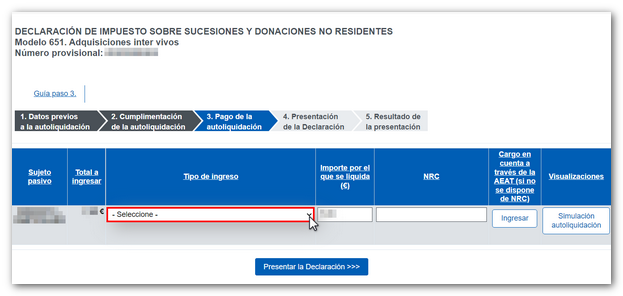
 After selecting the type of income and including, if required, the NRC , click "Submit the return".
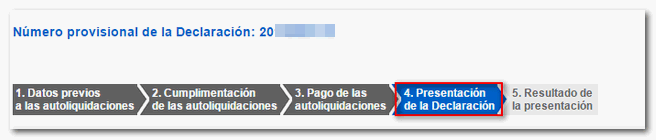
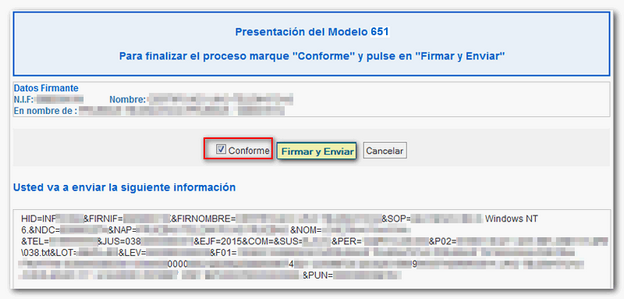
4. Filing the return.
The program will display a screen with a summary of all the data contained in the declaration and the "Sign and Send" button.
In the next window, check "I agree" and press the "Sign and Send" button again.
5. Result of the presentation
The result of a correct submission will be a screen with the proof of submission and the CSV, of the presenter and the taxpayer (Holder). This CSV will be used to download the document in the "Document verification using secure verification code ( CSV )" section.