Models 349 to 721
Skip information indexModel 349 Submission by form
Form 349 can be submitted using the web form available on the Electronic Office; It allows the declaration to be completed, validated, and stored in the cloud to recover the work session at another time, as well as submitting the correct records included in the declaration.
Please note that the web form is available if the return contains up to 40,000 records. If you exceed this threshold, you will need to use the file submission option.
Filing online requires identification with an electronic certificate, DNIe eitherCl@ve of the declarant. In addition to the holder of the declaration, it may also be submitted by a third party acting on his or her behalf, whether it be a social collaborator or a representative to carry out the procedure.
We recommend that you clean up the census of those who have filed tax returns using the tax identification service before filing your return to avoid identification errors. To do this you can use the option available on the website: "Checking a NIF of third parties for census purposes" located in "Help", "Tax Identification" of the section "2025 Information Statements Campaign". You will also find this option in the procedures for Form 030.
To correctly view all parts of the form, before accessing it, check the zoom and font size set in the browser (once the declaration has been submitted, you can return to the previous zoom and font size).
-
In Microsoft Edge , go to the three horizontal dots, in zoom select 100% with the "+" and "-" signs. Go back to the three horizontal dots to enter "Settings", select "Appearance" and under "Fonts", "Font size" select "Medium (recommended)".
-
In Google Chrome , go to "Settings" (from the three vertical dots), "Appearance", "Font size" and select "Medium (recommended)", in "Page zoom" select 100%. You can also select 100% zoom from "Zoom In/Out".
-
In Mozilla Firefox , access the three-stripe icon, in "Size" select 100% with the "+" and "-" signs, press "Options", "General", "Language and appearance" and in "Fonts and colors" select a size smaller than the current one, if you do not see the form correctly.
-
In Safari , go to "View," "Enlarge," or "Reduce."
After identification, an initial window will appear in which you must indicate the NIF of the declarant and the period.
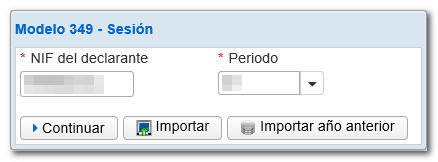
Next, select one of the three available options:
-
Continue: provides access to the form, for its online completion and submission. You can offer 3 options:
-
"Load work session from...": Using this option you can recover data from a session that you had previously saved.
-
"Upload the declaration submitted on...": If you have already submitted a declaration for the same NIF , model, fiscal year and period, you can recover it by selecting this option and make changes, adding or deleting records.
-
"Create a new declaration (if submitted, it implies the deletion of all previously submitted information)": Select this option if you want to complete the form from the beginning, without recovering data.

-
-
Matter: allows you to import a file with the BOE format previously generated that follows the current registry design. The file may have been obtained from the form itself, by exporting the declaration, or with an external program.
-
Import previous year: The form will automatically load the records from the previous year's declaration that are active on the AEAT server for the designated declarant. To do this, you need to access the form with a certificate, DNIe or Cl@ve of the owner or an authorized person.
After the initial window, you will access model 349 with its different sections "Declarant and summary of the declaration" (this is the one that will open by default), "Intra-community operations" and "Rectifications" . You can switch between them from the "Sections" tab at the bottom left (the bottom tabs can be shown or hidden from the "Show/Hide Information" button at the bottom of the form).
Fill in the "Declarant's information" and "Person with whom to relate". Please note that fields marked with an asterisk are required.
The fields in the "Declaration summary" section are not enabled for completion, as they are automatically calculated based on the data entered in the "Intra-Community operations" and "Corrections" sections.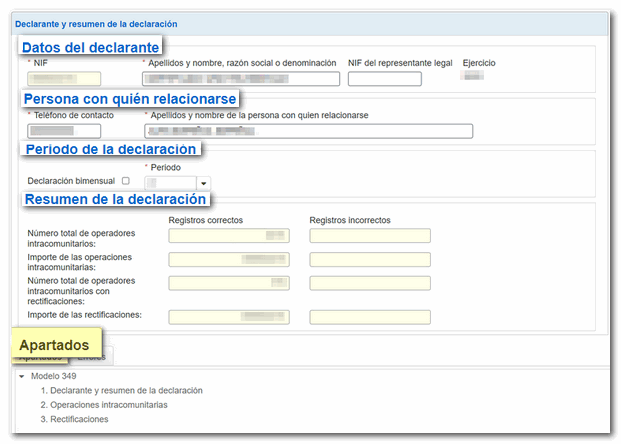
Intra-Community operations: In this section you will find a button panel from which you can register, deregister and navigate between records. To create a transaction, click on the "New record" icon, identified by a blank sheet of paper with a green "+" sign.
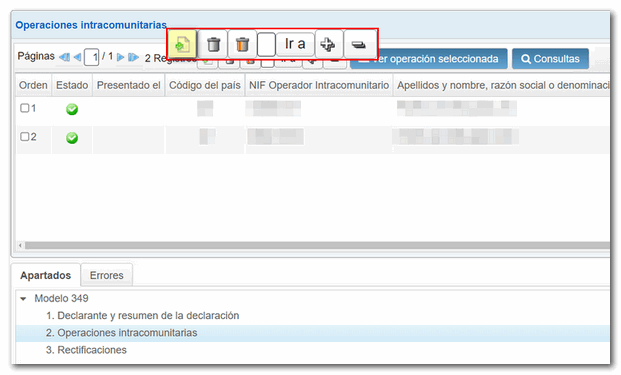
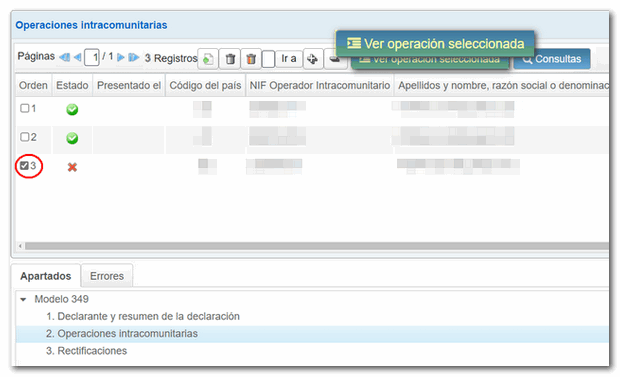
The list of operations will display the relationship of all the records entered with the information organized in columns.
Using the icons in the "Status" column, you can easily check which records are correct and which contain errors, in order to make the corresponding changes, additions or deletions.
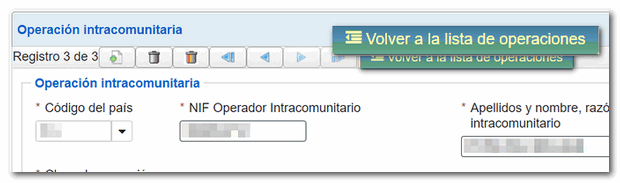
You can access the details of each record by double-clicking on the NIF or by selecting a specific record and clicking "View selected operation".
Once inside the details, you can return to the general list by clicking "Return to list of operations".
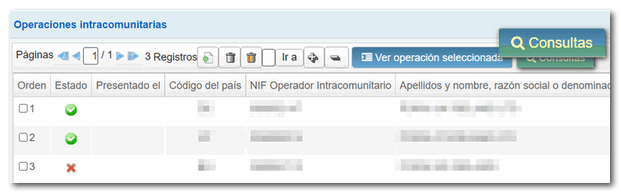
From the list of operations, you can perform queries by establishing filtering criteria. Press "Queries" at the top. In the new window, set the filter criteria and click "Query".
In the new window, set the filter criteria and click "Query".
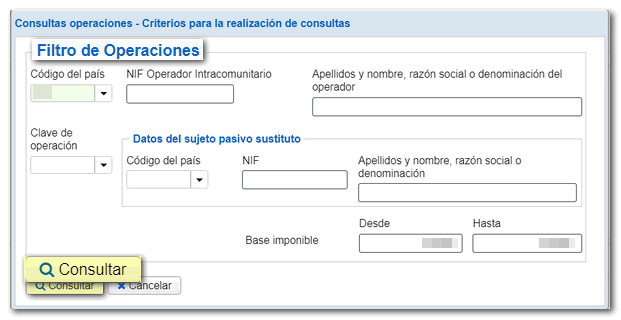
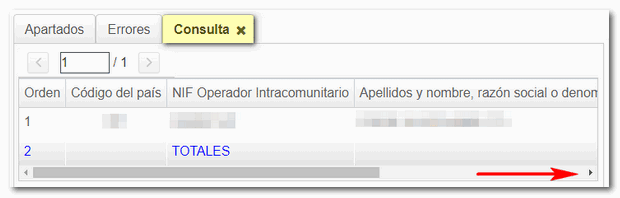
A new tab will be activated at the bottom called "Query", next to the "Sections" and "Errors" tabs with the results obtained based on the established search criteria.
The record information is spread across a single row across the width of the form, so you need to use the horizontal scroll bar to view the rest of it. However, double-clicking on any of the results displays the record information at the top of the form.
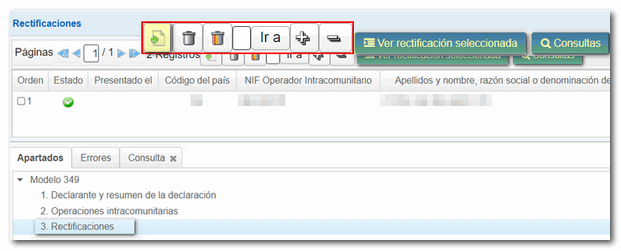
From the "Rectifications" tab you can manage the different records using the functions available at the top. As with operations, there are options to register, deregister and navigate between records. You can also access the details of each correction, make queries or view the validation status of each record.
At the bottom of the screen are the available form options.
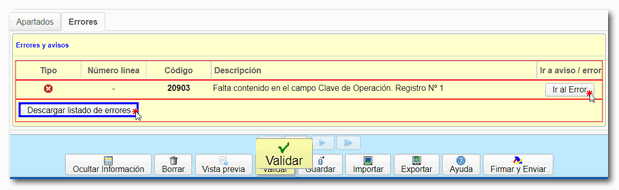
To check if the declaration has been completed correctly, press the button "Validate" . The "Errors" tab will be enabled and the codes and descriptions of the detected warnings or errors will be displayed.
Note: Notices inform you that you should review certain information, but do not prevent submission or export. Errors, however, require correction so that the declaration can be exported or submitted.
In case of errors, by clicking "Go to Error" the application will go directly to the box or section that you need to correct. Using the "Download error list" option, a XML file will be generated with all the errors detected, which you can open or save on your computer.
Finally, if the statement contains no errors you will get the message "No errors exist".
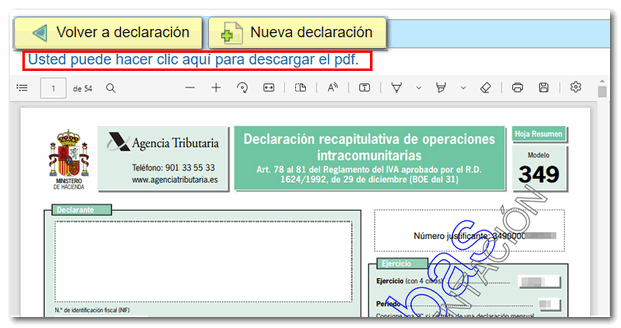
If you want to obtain a draft to review the data before filing your return, you have the " Preview " tool that generates a PDF with the return, not valid for filing. The PDF is displayed on the screen and you can also download it from the option "click here to download the pdf". Please note that to correctly view the draft you need to have a PDF viewer. To return to the declaration from the draft, click "Return to declaration." To complete a new declaration, select "New declaration".

Using the "Save" option you can save the data completed up to that point on the server, even if the declaration is not validated (it may contain errors or be incomplete). This way you can exit the form without losing any information. Likewise, if the form were to close after the inactivity timeout period, you could recover the data entered up to the time of saving.
To retrieve the saved information, access form 349 again. In the initial window, after indicating the NIF of the declarant and the period and clicking "Continue", select the option "Load the work session of...".

Note: It is not possible to store more than one statement on the server using the "Save" option. The last saved session will overwrite the previous one.

The form has a timeout due to inactivity, we recommend that you save the declaration periodically to avoid data loss.
Using the "Export" button you will generate a declaration file valid for submission, with the published logical design format (format BOE ). This option requires that the declaration be validated (it must be complete and not contain errors). The file will have the name NIF and the extension .349. It will be saved by default in the system "Downloads" folder or in the default directory in the browser, although you can select another directory.

The exported file (or generated with an external program following the published record layout) can be imported into the form using the "Import" option.

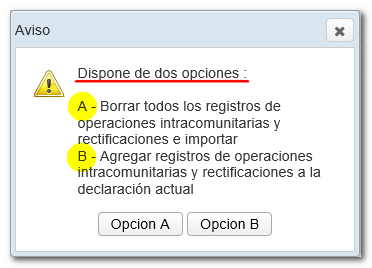
If the declaration already contains data, 2 import options will be offered after selecting the file:
- A. Delete all records of intra-community operations and corrections and import (all existing recipients will be deleted before importing the file).
-
B. Add records of intra-community operations and corrections to the current declaration (the imported records will be added to the existing ones)
By clicking " Help " you will obtain a PDF with the regulations and information related to model 349, as well as the deadline, form, place of submission and registration design.

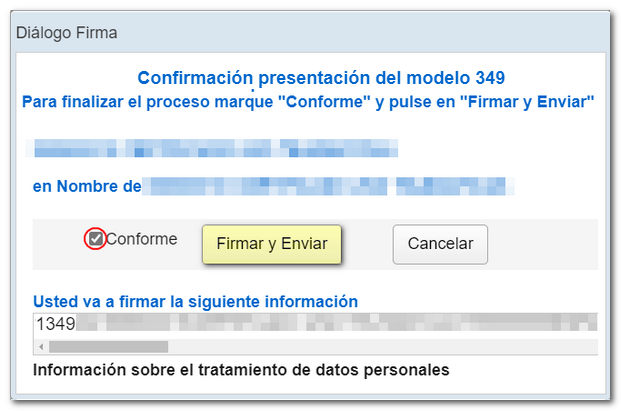
To submit the declaration, press the button "Sign and Send" .

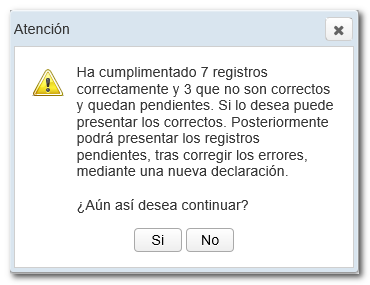
A notice will be displayed informing you of the number of correct and incorrect records completed. If you want to return to the declaration to correct errors before filing, click "NO". If you prefer to submit the correct records now and then correct the errors and file a new return later, click "Yes."
The contents of the declaration will be displayed in encrypted form in the new window. Check the box "I agree" to confirm the submission and press "Sign and Send" to continue with the submission.
The result of the submission will be a response page with an embedded PDF , containing a first page with the submission information (registration entry number, Secure Verification Code, receipt number, day and time of submission and filer details) and on subsequent pages, the full copy of the declaration.
In the event of partial submission, information will be provided in a notice and the option of returning to the declaration to make the corresponding changes, additions or deletions will be offered.
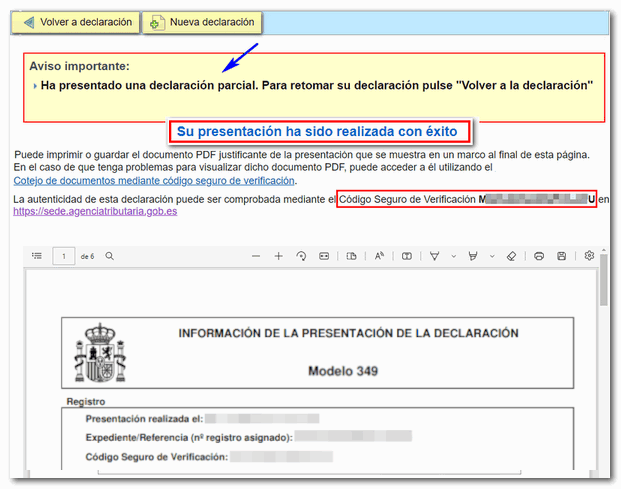
You can also recover the declaration submitted by accessing the form again, identifying the declarant and selecting the options "Continue", "Upload declaration submitted on...".
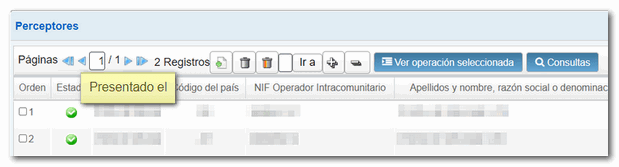
When you return to the statement, the list keeps all the records and includes the filing date of those already filed.
Note: Please note that the usual complementary and substitute options do not exist in this form. Once the necessary corrections have been made, you must submit the complete return, including all records that must be declared. Likewise, a new declaration submitted will result in the cancellation of the previous one.