Form 650
Skip information indexHow to electronically submit Form 650. Non-residents
Form 650 must be submitted in cases where taxpayers must comply with their obligations under this Tax to the State Tax Authority and, therefore, the income has not been transferred to the Autonomous Communities, pursuant to the provisions of Law 22/2009, of December 18. The deadline for submission is six months from the date of the death of the deceased or from the date on which the declaration of death becomes final.
To correctly view all parts of the form, before accessing it, it is recommended to check the zoom and font size set in the browser (once the declaration has been submitted, it will be possible to return to the previous zoom and font size).
-
In Microsoft Edge , from the three horizontal dots icon, located in the upper right corner and under "Zoom" select 100% with the "+" and "-" signs, then press "Settings", "Appearance", "Fonts" and under "Font size" select "Medium (recommended)".
-
In Google Chrome , from "Settings" (by clicking on the three vertical dots at the top right of the browser), "Appearance", in "Font size" select "Medium (recommended)"; In "Page Zoom" select 100%. You can also select 100% zoom from "Zoom In/Out".
-
In Mozilla Firefox , from the three-stripe icon, in "Size" select 100% with the "+" and "-" signs; In "Options", "General", "Language and appearance" and in "Fonts and colors" select a size smaller than the current one, in case the form does not display correctly.
-
In Safari , from "View", "Zoom In" or "Zoom Out".
The presentation may be made by the taxpayer himself when he is the only one liable, by a person authorized by the rest of the taxpayers or by a social collaborator acting on behalf of all the taxpayers.
Identify yourself with a digital signature (certificate or electronic DNI ) or through the identification system Cl@ve .
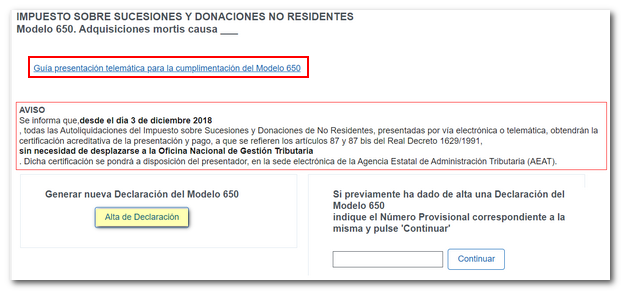
Upon access, a screen will appear with two options:
- High declaration : to generate a new statement.
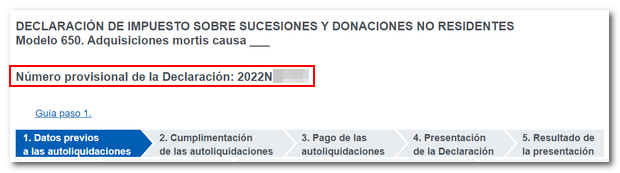
- Continue : to continue with a previously filed statement. It will be necessary to indicate the provisional number generated when saving the declaration.
At the top, there is a link to the guide for completing the form. It is recommended that you read the notice and take into account that all declarations submitted electronically or telematically will receive a certificate proving submission and payment. To start the declaration, press the "Submit Declaration" button.
The program consists of five sections:
- Data prior to self-assessments
- Completion of self-assessments
- Payment of self-assessments
- Presentation of the Declaration
- Result of the presentation
1. Data prior to self-assessments
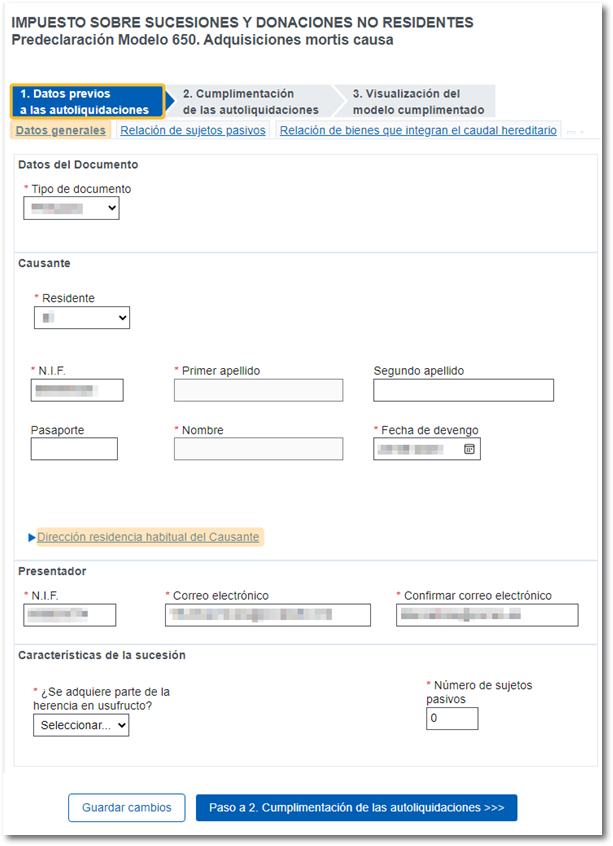
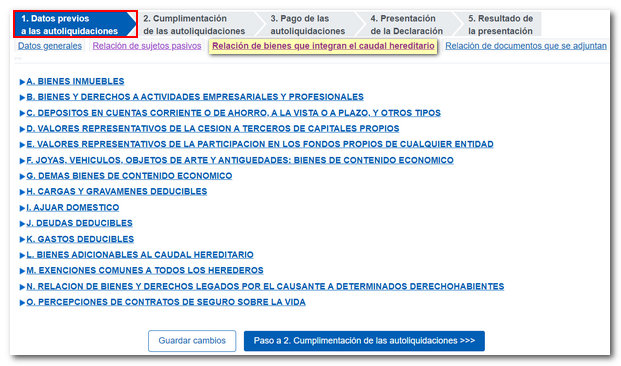
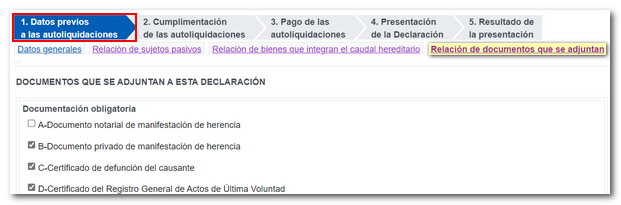
This first step consists of four tabs: "General information", "List of taxpayers", "List of assets comprising the estate" and "List of attached documents".
Please note that fields marked with an asterisk are mandatory.
It is not necessary to enter all the data or carry out all the steps in a single session, since the "Save Changes" option allows you to save the data completed up to that point and retrieve it later. A provisional declaration number will be generated which will be used to recover it from the "Continue" option in the initial window. Before leaving the session, it is always recommended to press "Save changes".
In the first tab "General information" , you must specify whether it is a public or private document, fill in the identification data of the deceased and display the "Habitual residence address of the deceased" tab to add additional information, and indicate the data of the presenter and the characteristics of the succession.
In the following tab "List of taxpayers" , the data of each of the taxpayers of the tax (heirs) who sign the self-assessment will be completed, indicating whether or not they are residents in Spanish territory, the personal data by displaying the "Habitual residence address of the taxpayer" tab to add additional data, the title of succession (you can mark one or several cells) and the data of the settlement (if it is complementary, the proof number of the previous one must be entered). The program will only perform calculations if state regulations apply. Click the "Add a taxpayer" button.
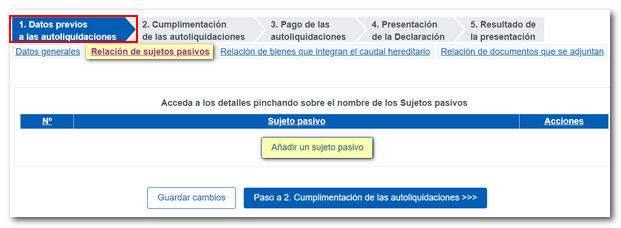
From this same tab you can also delete and register new taxpayers.
In tab "List of assets that make up the hereditary estate" , data such as the value or percentage of ownership must be indicated depending on the types of assets. Please note that some of them, such as the "Relic Flow" and "[16.] Calculated Value" boxes are automatically calculated and cannot be edited.
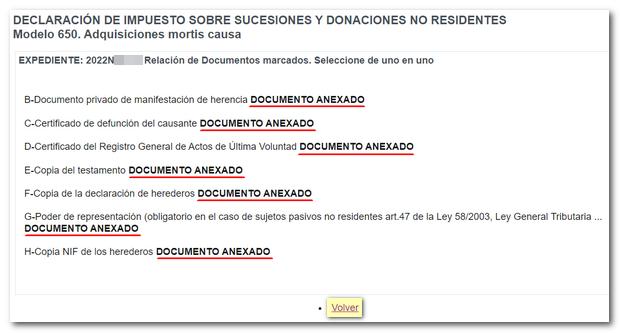
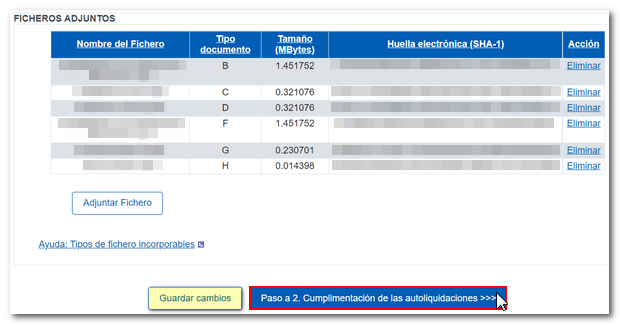
In the last tab "List of documents to be attached" , the files of all the required documents will be attached. The program determines the mandatory documentation in each case. It is recommended that these files be saved in the AEAT folder on the local disk. The file name must not include punctuation marks and the size must not exceed 100 Mb . Each file must be attached individually.
In the "Help" link: "Embeddable file types" provides information about the permitted extensions of files that can be attached.
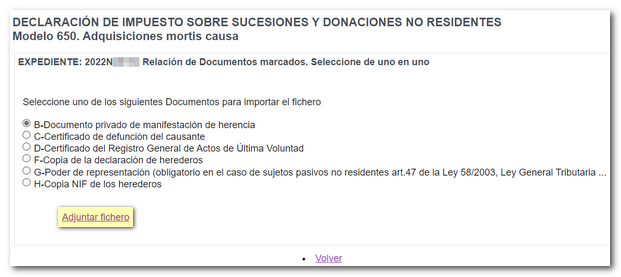
Mark the documents in the list and click on the "Attach file" button; In the next window, select the document to be provided and click "Attach file".
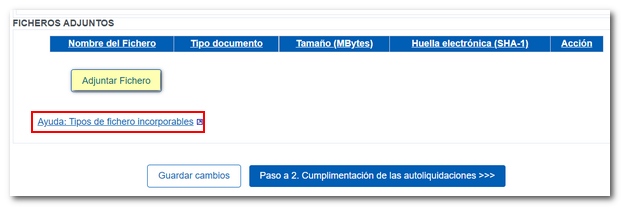
Once all documents have been attached, click "Return". The program will display the records with the attached files.
When there are no errors in step 1, you can access the next step: "Completion of self-assessments." Remember to save your data before continuing.
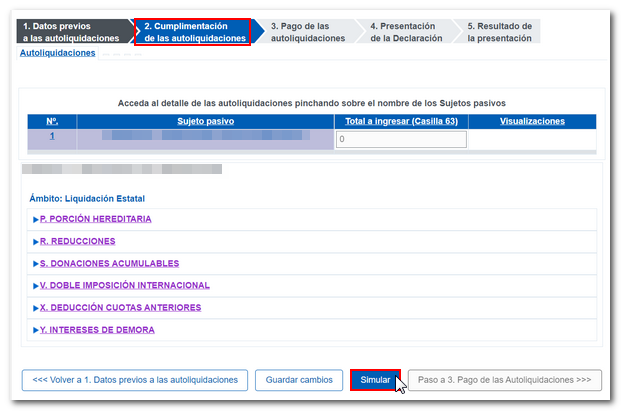
2. Completion of self-assessments
By clicking on the order number or the name of the taxpayer, you can access the details of the self-assessment to complete the completion.
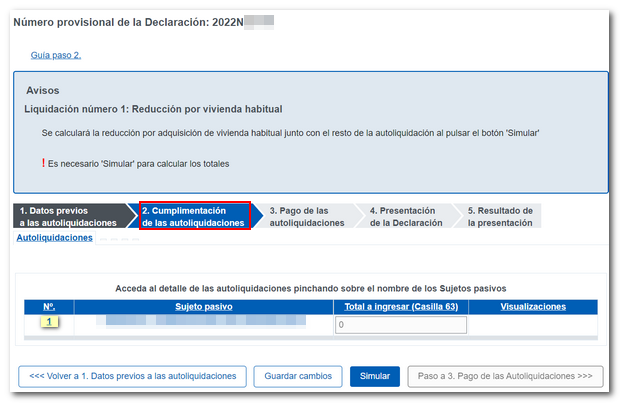
By clicking "Simulate" you will obtain a PDF , with the result of the self-assessment, which is not valid for filing. Both the individual self-assessments of taxpayers and the complete form can be viewed. Before proceeding with payment, you must consult the self-assessment by clicking the "Self-assessment simulation" and "Complete model simulation" buttons.
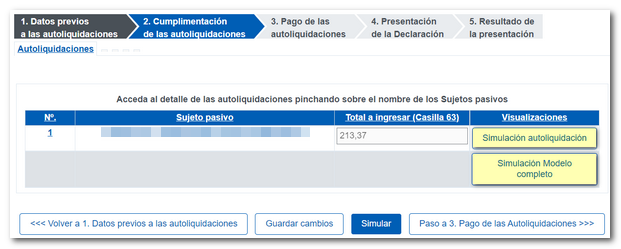
The generated PDF is saved by default in the AEAT folder, although an alternative path can be selected.
Once all the data has been entered and reviewed, if it is correct, press "Step 3. Payment of Self-Assessments".
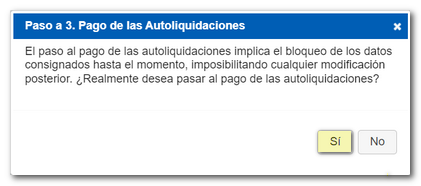
3. Payment of self-assessments
By moving on to step 3, the data entered up to this point will be blocked, preventing any subsequent modifications. Click "Yes" on the prompt.
In this step, the list of taxpayers is shown with the result of their self-assessment. If the result is to be entered, the type of entry must be selected from those shown in the drop-down menu. Depending on the selection, it will be mandatory to include or not a Full Reference Number ( NRC ).
You can obtain the NRC directly from the Bank or through the payment gateway by clicking the "Enter" button in the "Account charge through AEAT column (if you do not have NRC )" .
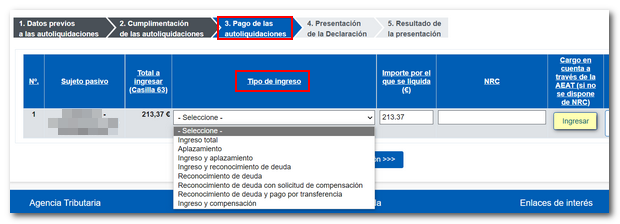
The "Enter" button links to the AEAT payment gateway to obtain the NRC. This NRC must be generated for the accrual year (death) and not for the current year.

Once the NRC have been included, the declaration can be submitted. If you select payment methods other than "Pay", for example, "Deferral", "Acknowledgement of debt" or "Acknowledgement of debt and payment by transfer", you must delete the amount from the "Amount to be settled (€)" box and then click on "Submit declaration".
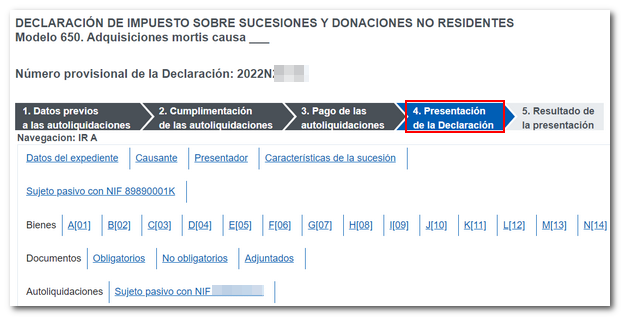
4. Filing the return.
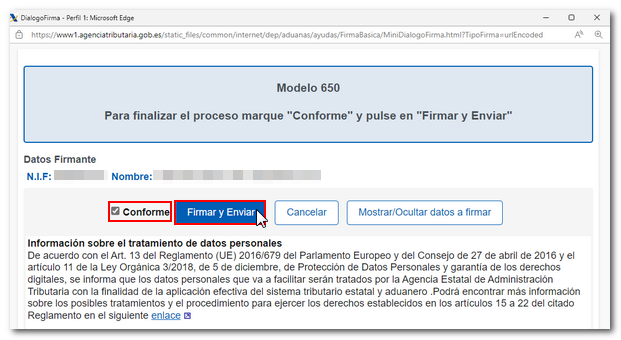
A screen will be displayed with a summary of all the data contained in the declaration and access to the file data: causer, presenter, characteristics of the succession, etc. Finally, click the "Sign and Send" button at the bottom.

In the next window, the information to be sent will be displayed in encoded form at the bottom. Check the "I agree" box and press "Sign and Send" again.
5. Result of the presentation
The result of a correct presentation will be a screen with several receipts. In the "Notifications" window, a CSV is provided to check it in the "Document verification using secure verification code ( CSV )" section.
In the links "Presenter" and "Taxpayer with NIF XXXXXXXXX", you will obtain the receipts in PDF with the registration data, the presenter and the holders of the declaration.
In the "View the complete form 650 to print" access, form 650 is generated in PDF completed with the corresponding copies for the interested parties and the Administration.
In the " CSV " column of the table below, generate form 650 for each taxpayer and presenter, but without the cover page that is generated in the receipt.
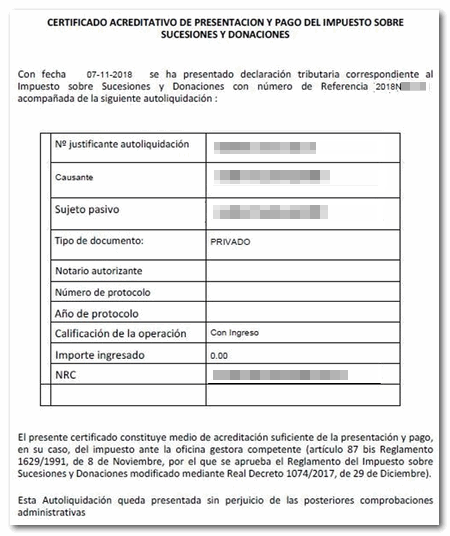
Obtaining the certificate
From December 3, 2018, the certification referred to in article 87 bis of the Inheritance and Gift Tax Regulations, approved by Royal Decree 1629/1991, of November 8, can be printed and downloaded from the electronic headquarters of the Tax Agency. When said certificate is available, it will be communicated by email, providing the Secure Verification Code ( CSV ) of each taxpayer. To download the certification with this CSV you must access the Electronic Document Comparison of the electronic office.
If any deficiencies are found in the documentation attached to the self-assessment, this will be communicated by email, informing you of the way to correct these deficiencies. This notice will also be available on the Electronic Office, in the personalized portal "My notifications".