Models 190 to 198
Skip information indexModel 190 Submission by form
Form 190 can be submitted using the web form available on the Electronic Office; It allows the declaration to be completed, validated, and stored in the cloud to recover the work session at another time, as well as submitting the correct records included in the declaration.
Please note that the web form is available if the return contains up to 40,000 records. If you exceed this threshold, you will need to use the file submission option.
Filing online requires identification with an electronic certificate, DNIe either Cl@ve of the declarant. In addition to the holder of the declaration, it may also be submitted by a third party acting on his or her behalf, whether it be a social collaborator or a representative to carry out the procedure.
We recommend that you clean up the census of those who have filed tax returns using the tax identification service before filing your return to avoid identification errors. To do this you can use the option available on the website: "Checking a NIF of third parties for census purposes" located in "Help", "Tax Identification" of the "2025 Informative Declarations Campaign" section.
This query is also found in the procedures for model 030 within "Census, NIF and tax address".
To correctly view all parts of the form, before accessing it, check the zoom and font size set in the browser (once the declaration has been submitted, you can return to the previous zoom and font size).
-
In Microsoft Edge , go to the three horizontal dots, in zoom select 100% with the "+" and "-" signs. Go back to the three horizontal dots to enter "Settings", select "Appearance" and under "Fonts", "Font size" select "Medium (recommended)", under "Page zoom" select 100%.
-
In Google Chrome , go to "Settings" (from the three vertical dots), "Appearance", "Font size" and select "Medium (recommended)", in "Page zoom" select 100%. You can also select 100% zoom from "Zoom In/Out".
-
In Mozilla Firefox , access the three-stripe icon, in "Size" select 100% with the "+" and "-" signs, press "Options", "General", "Language and appearance" and in "Fonts and colors" select a size smaller than the current one, if you do not see the form correctly.
- In Safari , go to "View," "Enlarge," or "Reduce."
After logging in, in the pop-up window, choose one of the options to access the form:
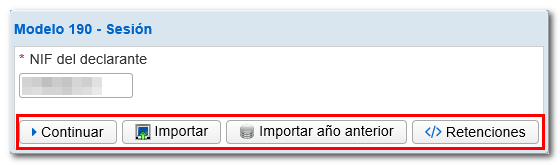
- Continue. It allows you to create a new declaration by entering all the data. Enter the NIF of the declarant and click "Continue".
- Matter. You can import a file with format BOE that follows the registration design of the current model 190, obtained with the form itself by exporting the declaration or with an external program. The file record limit will be 40000.
- Import previous year . Data from active records from the previous year will be imported at the time of the query. To do this, you need to access the form with an electronic certificate. DNIe either Cl@ve of the declarant, of the social collaborator who filed the declaration the previous year, of a delegated social collaborator whose NIF match that of the custodian of the certificate who filed the declaration of the previous year, of an attorney who filed the declaration the previous year, or of an attorney for the consultation of the declaration. It is not possible to import data from the previous year if the declaration exceeds 40,000 records.
- Withholdings. You also have a fourth button to import a file in the format XML of "Withholdings" for the year 2025.
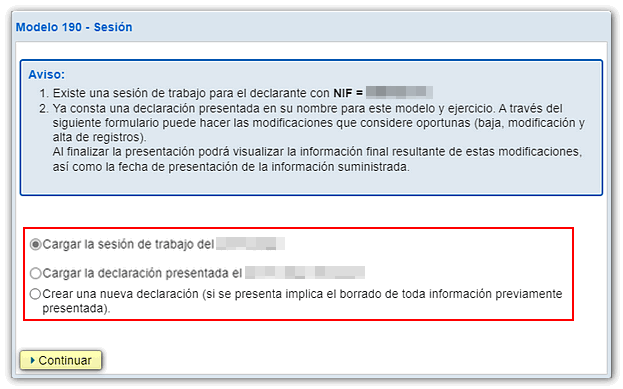
If when entering the NIF declarant and clicking "Continue" there is a saved work session or a previously submitted declaration, the application will show you the available options:
- In case there is a saved but unsubmitted work session and you want to recover it, check the box " Load the work session from dd/mm/yyyy ";
- If you have filed a return and wish to make changes to it, such as: cancellation, modification or registration of records, check the box " Upload the declaration submitted on dd/mm/yyyy hh:mm:ss ";
- To create a new declaration, check the box " Create a new declaration ".
Select an option and press "Continue".
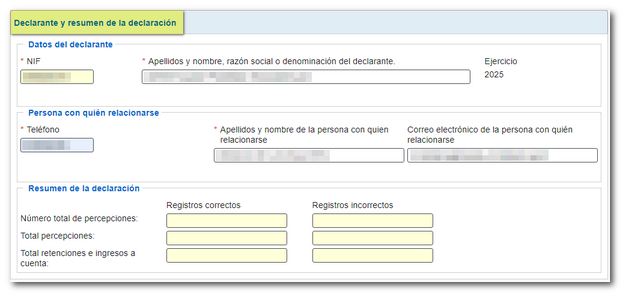
In the first window, " Declarant and summary of declaration ", fill in the boxes marked with an asterisk, since they are mandatory: the data of the declarant and the person with whom to relate.
The boxes in the "Return Summary" fields are automatically filled with the data entered in the "Recipients" section.
After completing the declarant's data, from the tab "Sections" , access the recipients.

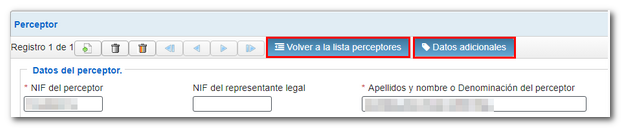
In the section " Recipients " you will find a button panel from which you can register, deregister and navigate between the different records. To register a recipient, click on the icon "New registration".

Fill in the data for each recipient. Remember that the fields marked with asterisks are mandatory and, depending on how they are filled out, check whether you need to add more data in the " Additional data " tab. Once completed, in this same window, you can add more recipients, delete the record and move between them or "Return to the list of recipients."
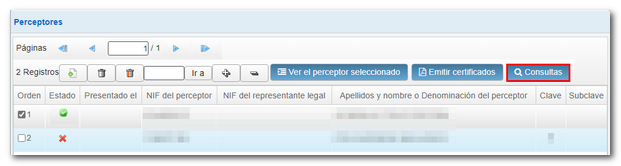
If you have registered several recipients, to view a specific one or modify its data, select it and press " View the selected recipient ".
In the list of recipients, the column "State"It allows you to check correct and incorrect records by the icon that is displayed."
If you have uploaded a previously filed return, the "Filed on" column will display the date and time each record was filed.

Individual or collective certificates can also be issued from the list of recipients, provided that the declaration does not contain errors. If you want to select all recipients click on the "+" sign (you can deselect the selection with the "-" sign icon). Once marked, press " Issue certificates " at the top. For information, see technical support: "How to issue certificates of form 190".
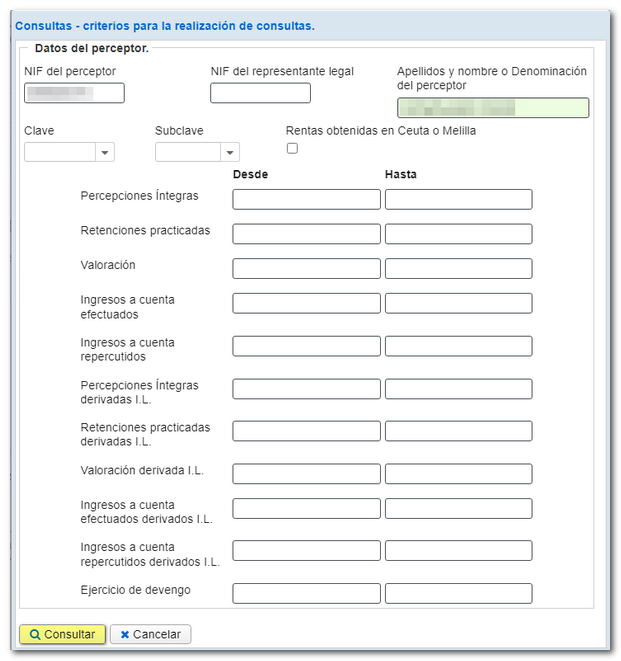
You can also perform queries by establishing filter criteria. To do this, click " Queries " at the top.
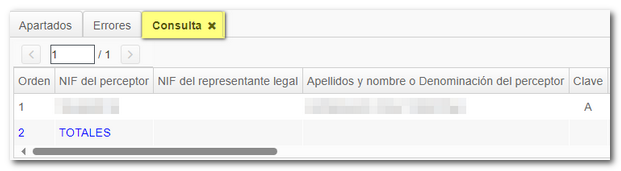
In the new window, set the filter criteria and click "Query". A new tab called "Query" will be activated at the bottom, next to the "Sections" and "Errors" tabs, with the information obtained according to the established criteria.
The record information is spread across a single row across the width of the form, so you need to use the horizontal scroll bar to view the rest of it. However, double-clicking on any of the results displays the record information at the top of the form.
At the bottom of the screen are the options available in the form. If you do not see the buttons or sections correctly, check the font size and zoom configured in your browser.
To check if there are any errors in the declaration, press the " Validate " button. If it contains errors or warnings, the "Errors" tab will be enabled with the description of the error or warning and the "Go to Error" or "Go to Warning" button, as appropriate, which will take you to the box to modify or complete.
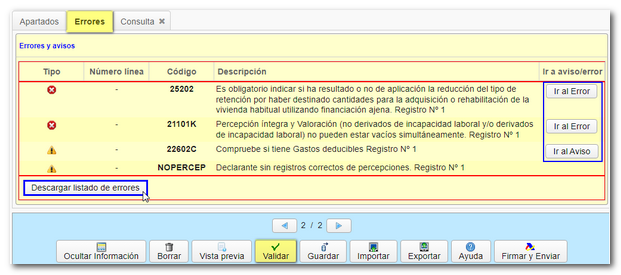
Using the "Download error list" option, a file in XML format will be generated with the detected errors, which you can open or save on your computer.
If the statement contains no errors you will get the message "No errors exist".

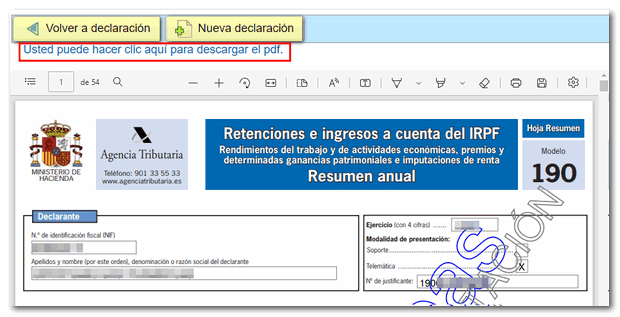
Additionally, if you want to obtain a draft to review the data before filing the return, you have the " Preview " tool, which generates a PDF with the return that is not valid for filing. The PDF is displayed on the screen; However, from the link "You can click here to download the pdf " it is possible to download it to your computer. Please note that to view the draft correctly, you need a PDF viewer. We recommend the latest version compatible with your operating system. To return to the declaration, click on "Return to declaration" located at the top of the draft window or create a new declaration from the "New declaration" button.

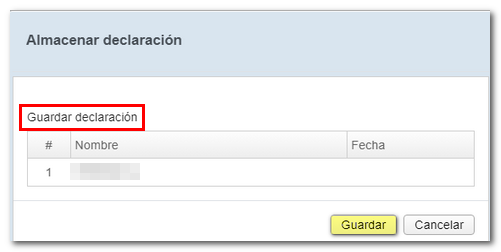
The " Save " option allows you to store the data completed up to that point on the AEAT servers, even if they are not validated (they may contain errors or be incomplete). Please note that if a previously saved statement already exists, it will be overwritten.
This data is retrieved by accessing the web form again by clicking "Continue". Once the NIF has been entered, if there is a declaration saved for that same NIF , the server will detect it and will give you the option to recover it from the "Load the saved session..." option.

The form has a waiting period for inactivity; we recommend that you save the declaration periodically to avoid data loss.
The button "Matter"It allows you to transfer data from a file in a specific format." BOE that complies with the registration design of model 190 in force.

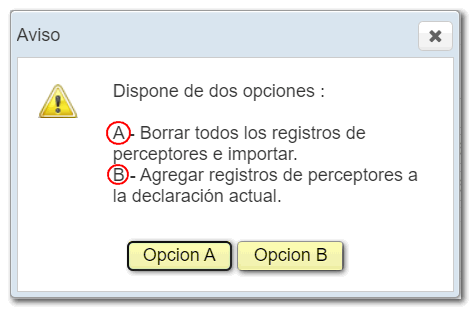
Once the file has been selected, the option will be offered to replace the entire declaration with the contents of the file, or to add the records contained in the file to the existing declaration.
Using the " Export " button you can generate a valid file for presentation, provided that the declaration does not contain errors, and save it in the path you want. This file is named NIF of the declarant and the extension .190. You can recover the file later using the "Import" option.

Under the " Help " button you have a PDF with the regulations and information regarding the model, as well as the deadline, form and place of submission and the registration design of model 190.
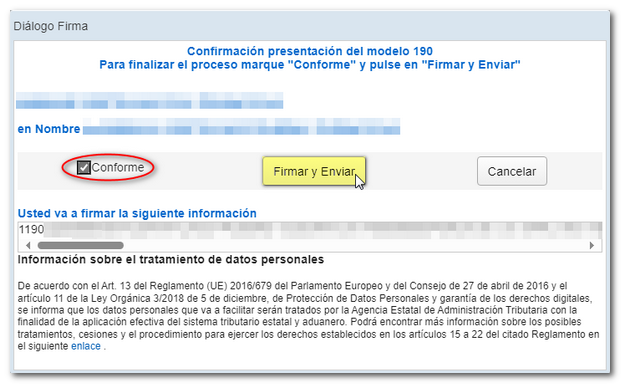
After validating and saving the declaration, you can submit it by clicking the " Sign and Send " button. Check "I agree" and "Sign and Send".
c
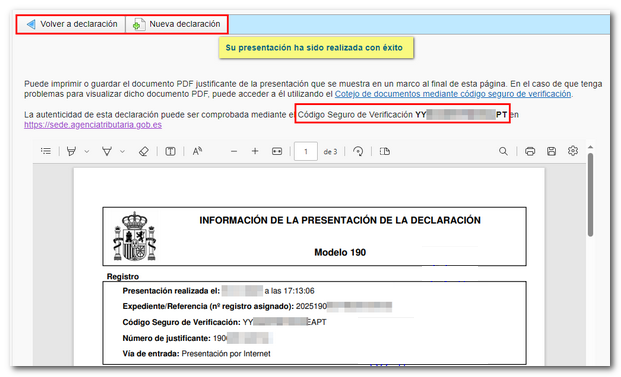
The result of a successful submission will be a response page with an embedded PDF containing a first page with the submission information (registration entry number, Secure Verification Code, receipt number, day and time of submission and presenter information).
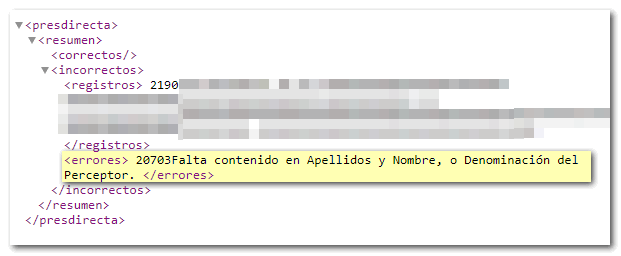
If the return contained incorrect records, please note that a partial return containing the correct records has been submitted. Click the "Return to declaration" button to check the records that have not been submitted due to errors and that are still pending submission.
If you have submitted a declaration with some valid records and some incorrect ones, the correct ones will be presented and you will be notified that you are going to send a partial declaration.

Make the necessary additions, modifications and deletions. Validate the declaration and resubmit the declaration with all records, that is, the correct ones submitted previously and the corrected or new records.